7 Simple Steps to Cook Ribs on a Pellet Grill
Cooking perfect ribs on a pellet grill can seem tricky, especially if you’re new to smoking meat or worried about ending up with dry or tough ribs. Many people struggle with getting that tender, smoky flavor just right, but you’re not alone. With a few simple steps, you can master the art of grilling ribs that fall off the bone every time.
To cook ribs on a pellet grill, start by cleaning and preheating your grill to 225°F. Fill the hopper with quality pellets like hickory or applewood for great flavor. Choose and season your ribs with a dry rub that suits your taste.
Place the ribs bone-side down on the grill. Cook low and slow for 3–4 hours, maintaining steady heat and smoke throughout the process. Wrap the ribs to lock in moisture and ensure they stay tender.
Let the ribs rest before serving to keep all those delicious juices inside. For more tips, follow along to perfect your smoky, tender ribs every time.
Key Takeaways
- Prepare and clean your pellet grill, making sure to set the right temperature and smoke levels before you start cooking.
- Choose high-quality ribs, season them with your favorite dry rub, and let them come to room temperature.
- Cook the ribs low and slow around 225°F to 250°F for 3 to 4 hours, keeping a steady temperature throughout.
- Wrap the ribs in foil or butcher paper during cooking to help retain moisture and keep them tender.
- Once cooked, let the ribs rest for 15 to 30 minutes, then serve with your favorite sauce and sides.
Prepare Your Pellet Grill for Perfect Ribs
Before you start cooking, it’s vital to prepare your pellet grill properly. Good grill maintenance guarantees consistent heat and prevents surprises during cooking.
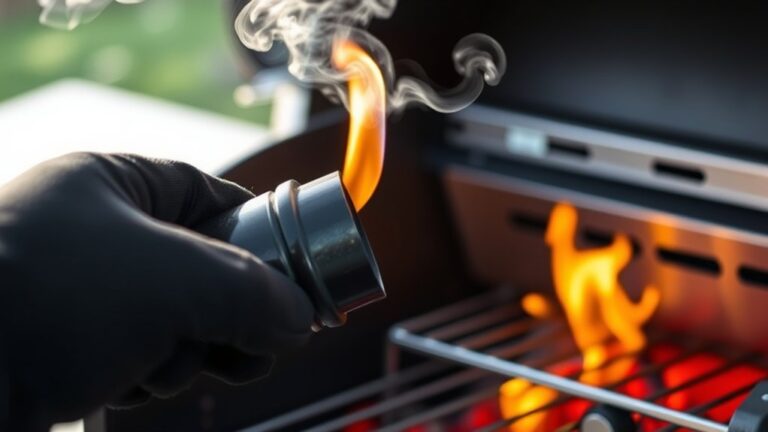
Begin by cleaning out any ash or leftover debris from previous sessions, and check that the grates are clean and free of rust. Make sure your pellet hopper is filled with high-quality pellets suited for ribs, like hickory or applewood, to boost flavor.
Clean ash and rust from your grill, and use high-quality pellets like hickory or applewood for flavorful ribs.
Adjust the temperature controls to a steady, low heat around 225°F to achieve tender, smoky ribs. Proper ribs storage before cooking is also key; keep your ribs chilled if you’re not cooking immediately, and bring them to room temperature beforehand.
This helps them cook evenly. If you plan to store the ribs temporarily, consider wrapping them in plastic or foil to prevent drying out.
Taking these steps guarantees your pellet grill is ready, and your ribs will turn out perfect every time.
Choose the Best Ribs and Seasoning for Your Grill
Choosing the right ribs and seasoning can make a big difference in how your barbecue turns out. For ribs, go with baby back if you want tender, quick-cooking meat, or spare ribs for a richer, meatier taste.
Look for ribs with good marbling and a fresh look. Avoid ones that look dry or have too much moisture. When it comes to seasoning, think about your flavor preferences.
Classic dry rubs with paprika, garlic powder, and brown sugar work great. Feel free to add cayenne for some heat or herbs for extra flavor. Keep it simple if you’re just starting out, or try bold blends if you’re more experienced.
The key is choosing seasonings that match your meat and personal taste. Remember, the quality of your ribs and seasonings really impacts the flavor and tenderness of your final BBQ.
Set the Right Temperature and Smoke Level on Your Pellet Grill
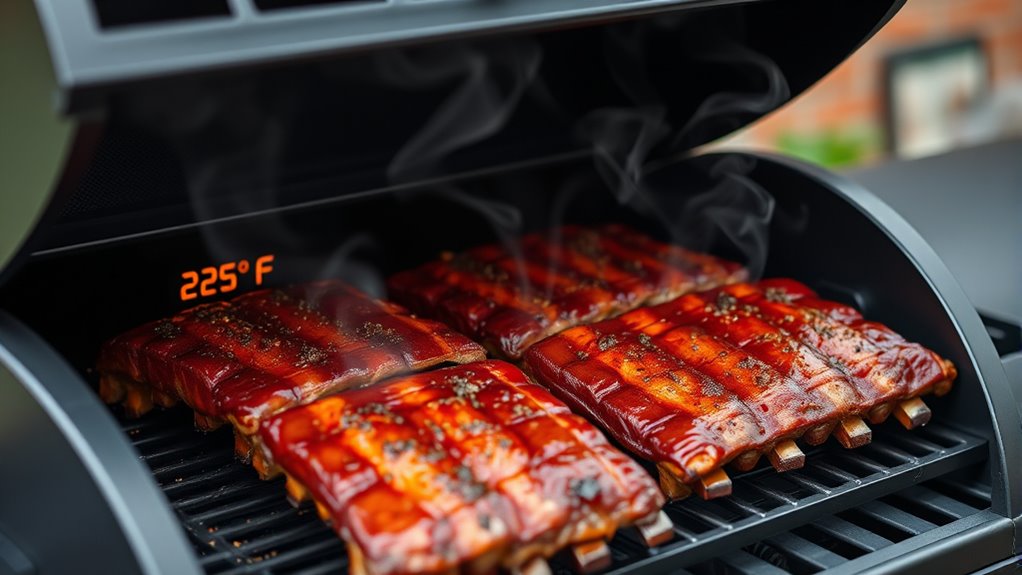
To achieve perfectly cooked ribs, you need to set your pellet grill to the right temperature and smoke level from the start. Temperature control is crucial; aim for around 225°F to 250°F for slow, even cooking that tenderizes the meat.
Set your pellet grill to 225–250°F and maintain a steady temperature for perfectly tender, flavorful ribs.
Adjust your grill’s thermostat to keep a consistent heat, avoiding fluctuations that can dry out or undercook the ribs. Smoke level is just as important—set it to a moderate level to infuse flavor without overpowering the meat.
Many pellet grills have a smoke setting or dial; use it to produce thin, blue smoke instead of thick, white smoke. This ensures a clean smoke flavor. Keep an eye on the grill’s temperature and smoke output throughout the process.
Proper temperature control combined with the right smoke level creates the perfect environment for ribs to become tender, flavorful, and juicy. This sets a solid foundation for the rest of your cook.
Step-by-Step: Cooking Ribs on a Pellet Grill
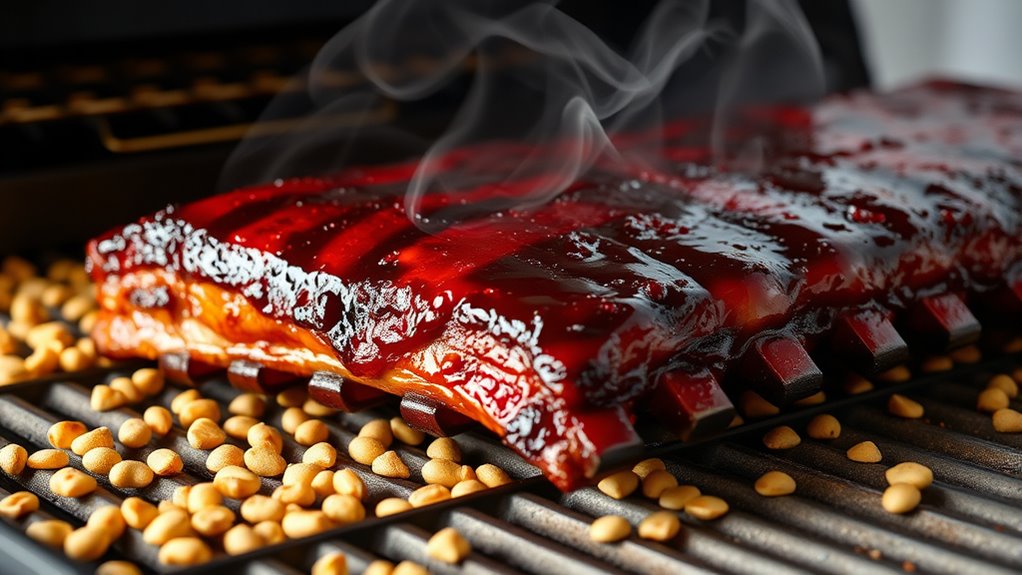
Once you’ve set your grill to the right temperature and smoke level, it’s time to start cooking the ribs. Begin by preparing your marinade options—whether you choose a simple dry rub or a liquid marinade—apply it evenly to boost flavor and tenderness.
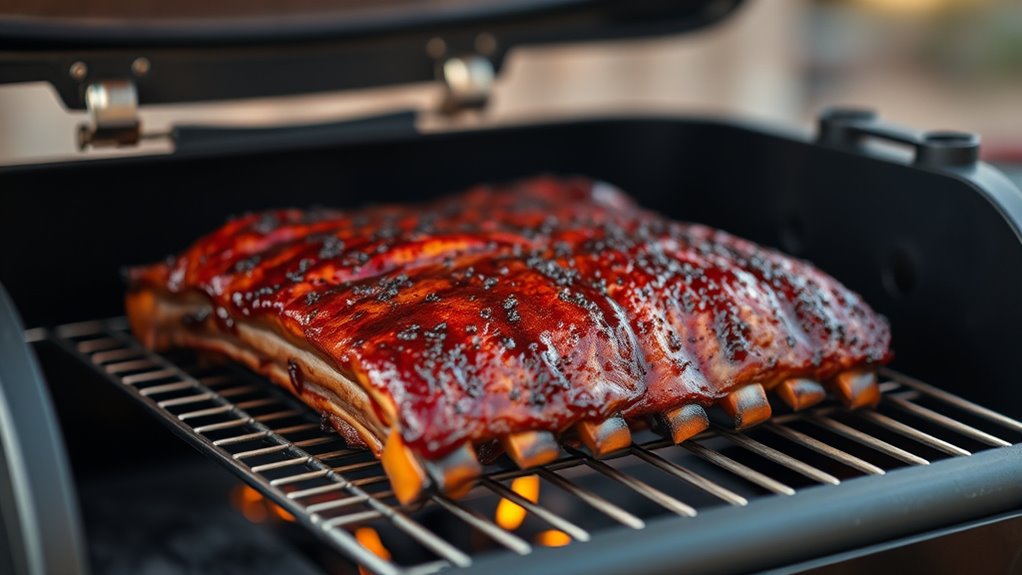
Place the ribs bone-side down on the grill grates, making sure they aren’t overcrowded so the smoke can circulate properly. Maintain a consistent temperature and cook the ribs low and slow.
Cooking times usually range from 3 to 4 hours, depending on how thick the ribs are and how tender you want them. During this process, try not to open the lid too often, as that can mess with the smoke and temperature.
Use a meat thermometer to check if the ribs are done; they should reach about 190°F to 203°F for that fall-off-the-bone tenderness. When they’re ready, let the ribs rest for a few minutes before serving to keep all the juices in.
Monitor and Adjust Your Grill for Consistent Results

To make sure your ribs turn out just right, it’s important to keep an eye on your grill’s temperature throughout the cooking process. Don’t be afraid to tweak the vent settings a bit to keep the heat steady—small adjustments can make a big difference.
And of course, using a good thermometer to check the internal temperature is a must. That way, you’ll know exactly when your ribs are perfectly tender and flavorful. It’s all about those little tweaks to get consistent, delicious results every time.
Check Temperature Regularly
Keeping an eye on your grill’s temperature is key to perfectly cooked ribs. Regularly checking the temperature helps you stay consistent and avoid undercooking or overcooking.
Use a reliable thermometer to monitor the grill’s heat throughout the process. Keeping a steady temperature promotes even cooking and enhances flavor.
Adjust your grill’s settings as needed to stay within the ideal range for your recipe. Don’t rely on guesswork—precision is essential for the perfect smoky taste and juicy texture.
Regular temperature checks let you respond proactively, making sure your ribs cook evenly and stay delicious from start to finish.
Adjust Vent Settings
Monitoring your grill’s temperature is only part of maintaining consistent results; adjusting the vent settings plays an essential role in controlling airflow and heat. Proper airflow control ensures your ribs cook evenly and stay tender.
Start by calibrating your vents, making small adjustments to find the right balance. If the grill runs too hot, open the vents slightly to increase airflow and lower the temperature. If it’s too cool, close the vents a bit to restrict airflow and boost heat.
Consistent vent calibration helps keep temperatures steady over long cooking periods. Remember, airflow affects both temperature and smoke absorption, so fine-tuning your vents is key to perfect ribs.
Regularly check and adjust the vents as needed to maintain ideal cooking conditions without overcomplicating the process.
Use a Thermometer
Ever wonder how to guarantee your ribs turn out perfectly tender and flavorful every time? Using a thermometer is a must for consistent results. It helps you monitor the meat’s temperature accurately, so you don’t overcook or undercook your ribs.
By checking the internal temperature, you can make precise adjustments to your grill’s heat if needed. This improves your cooking accuracy, leading to tender, juicy ribs with that perfect fall-off-the-bone texture.
Place the thermometer probe in the thickest part of the meat, avoiding the bone for the most accurate reading. Regularly checking the temperature prevents guesswork and ensures your ribs reach the ideal doneness.
With a reliable thermometer, you’ll master your pellet grill and get restaurant-quality results every time.
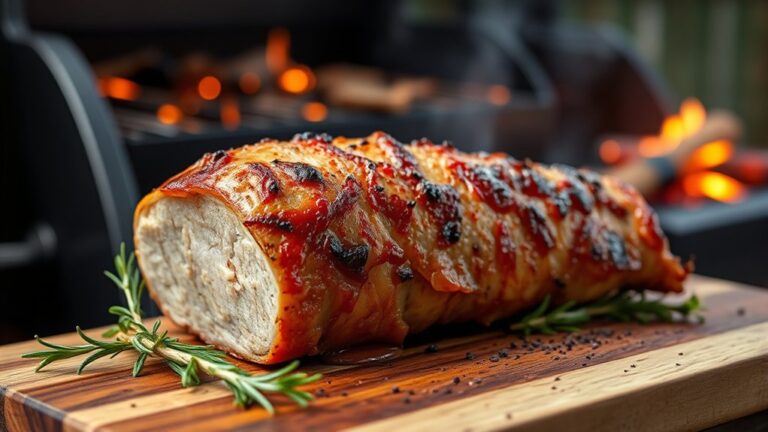
Wrap and Rest Your Ribs for Maximum Tenderness
Once your ribs have reached the desired tenderness, wrapping them in foil or butcher paper helps lock in moisture and boost their flavor. This creates a sealed environment so the ribs can reabsorb juices and stay juicy.
It also prevents the meat from drying out during the resting period. After wrapping, let the ribs rest for about 15 to 30 minutes. Resting allows the juices to spread evenly throughout the meat, making the ribs tender and flavorful.
Avoid slicing immediately; keep them wrapped and let them sit undisturbed. This step is key to getting maximum tenderness. During this time, the residual heat keeps softening the meat, improving the overall texture.
Once rested, unwrap the ribs. You’ll see the meat is juicy, tender, and ready to serve. Proper foil wrapping and resting are essential for mouthwatering, perfectly cooked ribs.
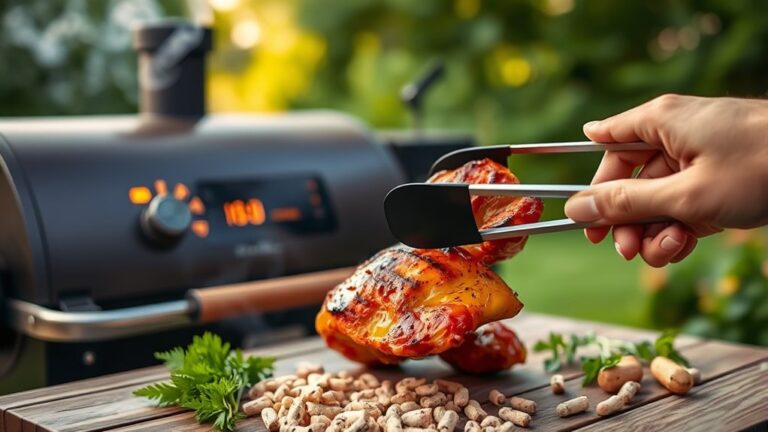
Serve and Enhance Your Ribs for Maximum Flavor
After your ribs have rested and are ready to serve, it’s time to refine their flavor and presentation. First, think about the sauce pairing—whether you like classic barbecue, spicy, or tangy. Adding the sauce just before serving boosts flavor and keeps the ribs moist.
Next, focus on plating. Arrange your ribs neatly on a platter and garnish with fresh herbs or sliced vegetables for a nice visual. To make the dish pop, brush on a little extra sauce for a shiny, appetizing look.
You can also sprinkle some coarse salt or smoked paprika to add flavor and a splash of color. Finally, serve your ribs with sides like coleslaw or baked beans to round out the meal. These simple steps will make your ribs look great and taste even better, impressing everyone at the table.
Proper sauce pairing and thoughtful presentation really make all the difference in delivering maximum flavor and eye appeal.
Frequently Asked Questions
What Types of Wood Pellets Are Best for Ribs?
For ribs, apple and cherry wood pellets are your best options because they add a sweet, fruity flavor that complements the meat beautifully. Hickory is also popular if you prefer a stronger, smoky taste.
When choosing your pellets, focus on pellet selection quality and consistency to guarantee the best wood flavor. These options will give your ribs a delicious aroma and tender texture, making your grilling experience even better.
How Long Can I Keep Cooked Ribs Warm Without Drying Them Out?
You can keep cooked ribs warm for up to 2 hours without drying them out, but always prioritize food safety. Keep the temperature at least 140°F to prevent bacteria growth.
To keep the ribs moist, wrap them in foil and place them in a warm oven or use a cooler wrapped in towels. This helps retain heat and moisture.
Avoid leaving the ribs out longer than 2 hours because extended times can affect both safety and quality.
Can I Cook Different Rib Cuts on a Pellet Grill Simultaneously?
Yes, you can cook different rib cuts at the same time on a pellet grill. Just keep in mind that different types, like baby back and spare ribs, have different cooking times and techniques.
To make sure everything turns out great, use a meat thermometer to check the internal temperature. Adjust your grill’s heat as needed to get the best results.
Keep the different rib cuts separated on the grill to prevent flavors from mixing. Also, plan your cooking times based on what each rib needs to cook properly.
How Do I Prevent Ribs From Sticking to the Grill Grates?
To prevent ribs from sticking to the grill surface, start by cleaning the grates thoroughly and preheating your pellet grill.
Then, apply a non-stick spray or a light coat of oil to the grill surface before placing the ribs. This creates a barrier that reduces sticking.
Make sure to handle the ribs carefully when turning or removing them, and avoid flipping too early. This can help keep them intact.
What’s the Best Way to Reheat Leftover Ribs?
To reheat leftover ribs while keeping them moist, try gentle reheating methods like wrapping them in foil and heating in the oven at 250°F for about 20-30 minutes.
You can also add a little broth or BBQ sauce before reheating to help keep them juicy.
Avoid high heat or microwaving, as these can dry out the ribs quickly.
Slow and low is the way to go to keep your ribs tender and flavorful.
Conclusion
Cooking ribs on a pellet grill is easier than you might think, and with a little practice, you’ll master that smoky, tender flavor everyone loves.
Some say the “low and slow” method is just a myth, but many BBQ fans swear by it. Science even shows that gentle heat helps break down connective tissue for melt-in-your-mouth results.
So trust the process and enjoy the journey. Soon, you’ll be the grill master everyone talks about for perfectly cooked ribs on a pellet grill!