Perfect Ribs Every Time: How Long to Cook on Pellet Grill
Many barbecue lovers dream of perfectly cooked ribs, but getting that tender, flavorful result can feel tricky. You’re not alone—most people struggle to find the right balance of heat and time.
Luckily, with a pellet grill, achieving those juicy, fall-off-the-bone ribs is totally doable.
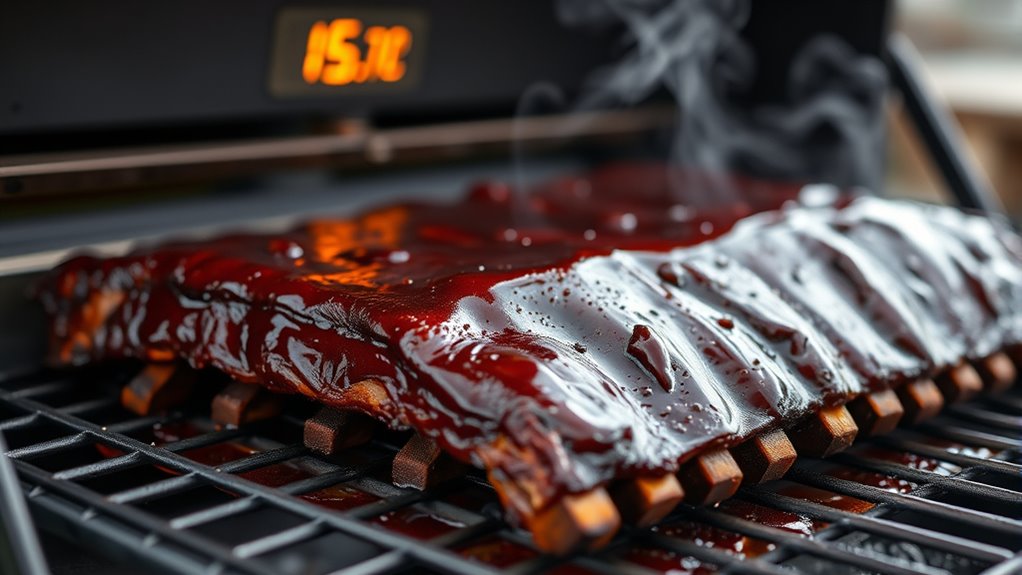
To cook perfect ribs on a pellet grill, set the temperature between 225°F and 250°F and cook for about 5-6 hours. Follow a steady cooking process, spritzing the ribs hourly, and wrap them in foil halfway through to speed tenderness.
Look for a deep caramel color, a flexible bend, and a pink smoke ring to tell when they’re ready. Keep your grill temp steady and you’ll get juicy, flavorful ribs every time—continues soon.
Key Takeaways
- Cook ribs at 225°F to 250°F for 5-6 hours for tender, flavorful results.
- Use the bend test and probe tenderness to figure out when they’re done, aiming for easy flexibility and little resistance.
- Wrap ribs in foil halfway through cooking to speed up tenderness and keep them juicy.
- Keep the grill temperature steady with proper vent adjustments and good-quality thermometers.
- Let the ribs rest for 10 minutes after cooking to boost juiciness and flavor.
How Long Should You Cook Ribs on a Pellet Grill for Perfect Tenderness?
To get perfectly tender ribs on a pellet grill, you’ll usually want to cook them for about 5 to 6 hours at 225°F (107°C). During this time, adding a marinade like spices, apple cider vinegar, or soy-based options can boost flavor and keep the meat moist.
Make sure to store your ribs properly before cooking—keep them refrigerated and only take them out right before grilling to keep them fresh. If you’re marinating, do it for a few hours or overnight, but don’t overdo it because that can change the texture.
While cooking, check the tenderness regularly. Your ribs should be bendable and pull away from the bone easily. After cooking, let them rest for a few minutes so the juices can redistribute, making each bite more flavorful and tender.
What’s the Best Temperature Range for Ribs on a Pellet Grill?
Finding the right temperature range is key to getting perfect ribs on a pellet grill. Usually, aim for between 225°F and 250°F. This allows the ribs to cook slowly, breaking down connective tissues for tender, juicy results.
When choosing a marinade, keep in mind that a good one can boost flavor without overpowering the meat. A marinade with the right balance of acidity and sweetness can also help tenderize the ribs even more.
Seasoning is just as important. Use a dry rub with spices like paprika, garlic powder, and black pepper to create a flavorful crust. Keeping the heat steady within this range ensures your ribs stay moist and develop that beautiful bark.
Cooking at too high a temperature can dry out the meat, while too low might extend cooking time unnecessarily. Consistent temperature control is essential for ribs that come out tender and flavorful every time.
Step-by-Step: The Typical Ribs Cooking Timeline
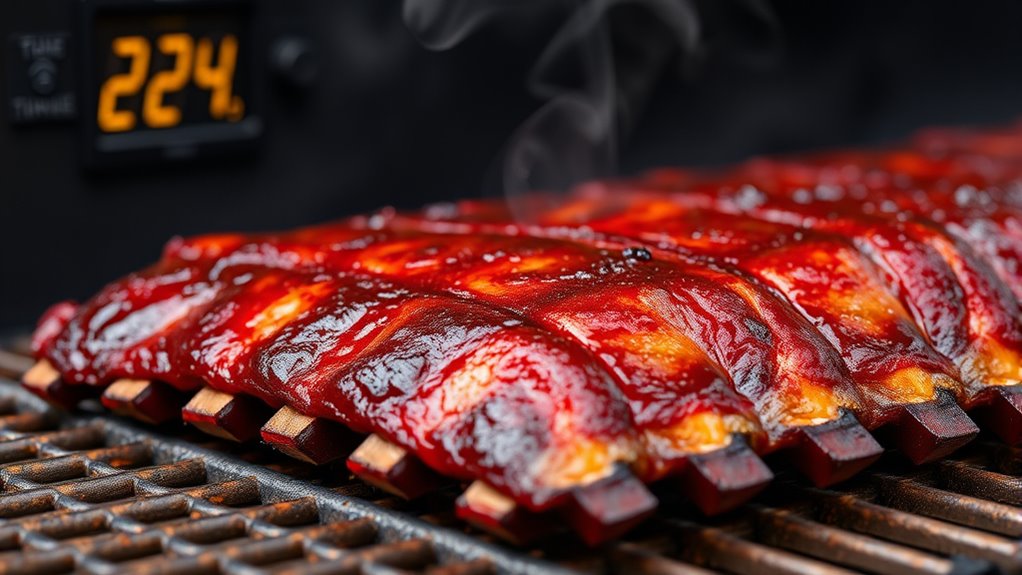
Cooking ribs on a pellet grill follows a consistent timeline that guarantees tender, flavorful results. Start by preparing your ribs with a dry rub or marinade, then set your grill to the ideal temperature, typically around 225°F.
Cooking ribs on a pellet grill at 225°F ensures tender, flavorful results every time.
For the first 2 to 3 hours, use indirect heat, maintaining a steady temperature to develop smoky flavors and tenderize the meat. During this phase, you can spritz the ribs with apple juice or vinegar every hour to keep them moist.
After this initial period, wrap the ribs in foil with a splash of liquid like apple juice or broth. Cook for another 2 hours to lock in moisture and boost tenderness.
Finally, unwrap the ribs and cook for an additional 30 to 60 minutes to develop a caramelized exterior. This step-by-step timeline balances cooking techniques with flavor enhancements to ensure perfect ribs every time.
How to Adjust Cooking Time Based on Ribs Thickness and Size
Adjusting the cooking time is key when dealing with ribs of different sizes and thicknesses. Thicker or larger ribs require extra time to ensure the smoke infusion penetrates fully and the rib seasoning works its magic.
To gauge the right cook time, start by checking the rib thickness and size. Thinner ribs may need 15-30 minutes less, while thicker ones could need an additional 30 minutes or more.
Keep in mind, the goal is tender, fall-off-the-bone ribs, so use visual cues and probe tenderness as guides. When adjusting, maintain consistent smoke infusion, which enhances flavor and helps break down connective tissue.
If your ribs are larger or thicker, consider wrapping them in foil halfway through to speed up cooking without sacrificing moisture. Always monitor internal temperature and texture, adjusting your pellet grill’s timing accordingly to achieve perfectly seasoned, smoky ribs every time.
How to Keep Your Grill at the Right Temperature During Cooking
Want to keep your grill at just the right temperature while you’re cooking? The first thing you’ll want is a good, reliable thermometer. It’s the best way to keep an eye on the heat and make sure everything’s cooking evenly.
Also, controlling the airflow is super important. Adjusting the vents can help stabilize the temperature — open them up if it’s getting too hot, or close them a bit if it’s too cool. Keep a lookout for the weather too, since things like wind or humidity can throw off your heat levels.
If you pay attention to these little details, your ribs (or whatever you’re grilling) will turn out perfect every time!
Use a Quality Thermometer
Since maintaining the right temperature is key to perfectly cooked ribs, investing in a high-quality thermometer is a smart move. A reliable thermometer helps keep your grill at the ideal heat, so you won’t have to worry about overcooking or undercooking.
This precision lets you monitor the internal temperature of the ribs, which is crucial for getting tender, juicy results. Remember, marinade recipes and seasoning can influence cooking times, so temperature control becomes even more important.
A good thermometer allows you to quickly adjust your pellet grill’s settings, keeping the heat steady throughout. Relying on accurate readings takes the guesswork out of grilling, ensuring your ribs reach the perfect doneness without sacrificing flavor or texture.
All in all, this small investment makes a big difference in your grilling success.
Maintain Consistent Airflow
Maintaining consistent airflow is key to keeping your pellet grill at the right temperature during cooking. Proper airflow helps distribute heat evenly and produces steady smoke, which is crucial for tender, flavorful ribs.
Check regularly to ensure vents are open enough to allow airflow without causing turbulence. Avoid opening the lid too often, as that can disrupt airflow and mess with the temperature.
Using quality pellets and keeping the burn pot clean also helps airflow work efficiently. When airflow stays steady, your grill produces consistent smoke flavor, making your ribs taste just right.
Keep an eye on the grill’s internal temperature and adjust the vents gradually. This helps you maintain ideal airflow and cook your ribs perfectly with balanced heat and smoky richness.
Monitor Ambient Conditions
Monitoring ambient conditions is key to keeping your grill at the right temperature during cooking. Humidity control is important because high humidity can cause temperature fluctuations, while low humidity can dry out your meat.
Use a reliable thermometer to track both grill and ambient air temperature. Keep an eye on pellet quality too, since poor-quality pellets can produce inconsistent heat and extra ash, which affects temperature stability.
Adjust your vents to maintain steady airflow and prevent temperature swings. If the weather is humid or windy, consider placing a windbreak or cover to shield your grill.
Staying attentive to these factors ensures your grill maintains a consistent heat, so your ribs come out perfectly cooked every time.
Using the 3-2-1 Method for Fall-Off-the-Bone Ribs
The 3-2-1 method is a tried-and-true technique for getting tender, fall-off-the-bone ribs on a pellet grill. It has three stages: cooking the ribs uncovered, wrapping them in foil, then finishing with a final unwrapped phase.
This method locks in moisture and boosts the smoke flavor, making your ribs irresistibly tender. Start with a good rib seasoning that complements the smoky profile for the best results.
During the first hours, keep your pellet grill at a steady temperature and ensure your smoke stays consistent. When wrapping, add a splash of liquid like apple juice inside the foil for extra moisture.
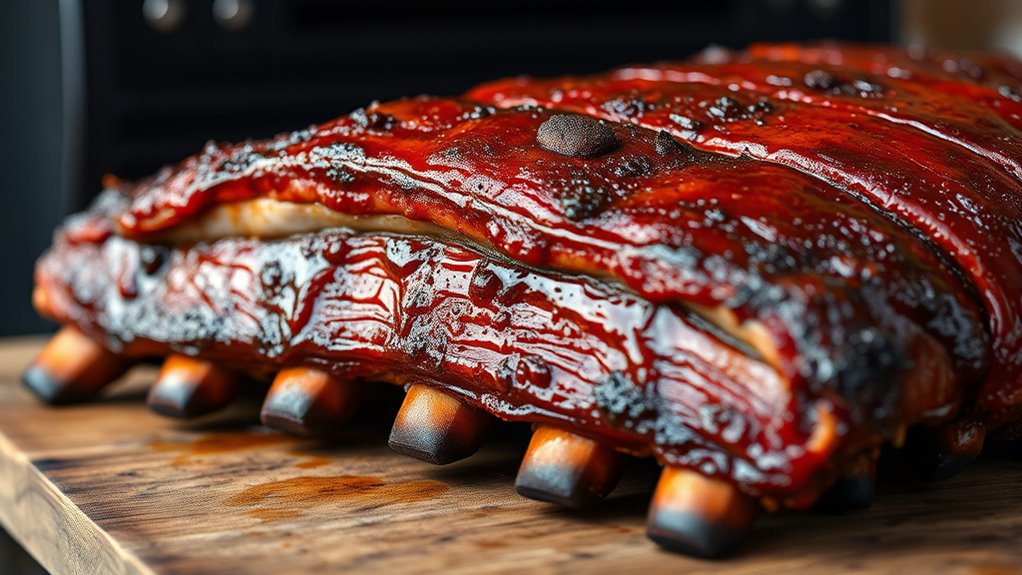
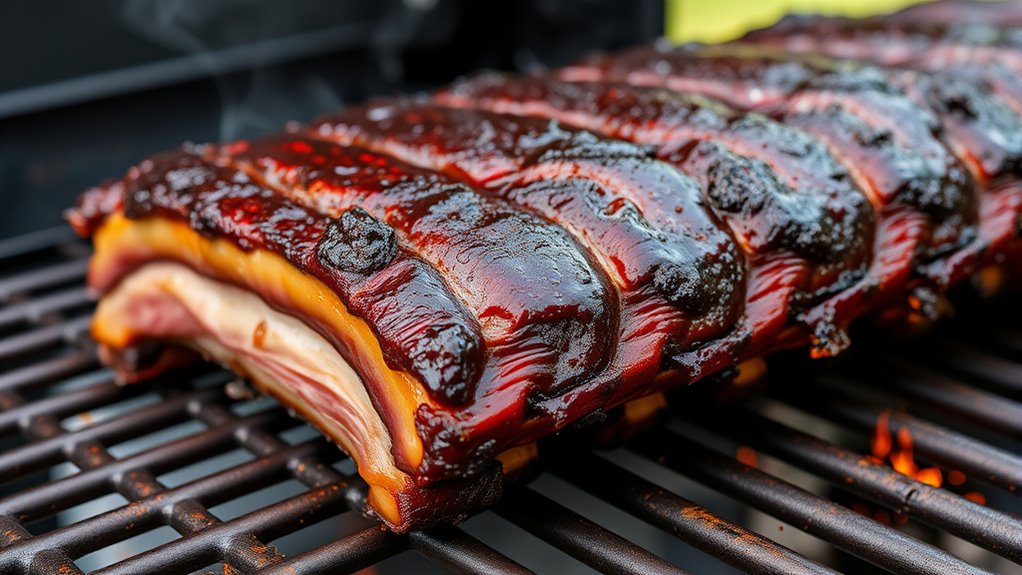
How to Tell When Ribs Are Done : Visual and Tenderness Tests
To figure out if your ribs are ready, start by looking at their color. They should have a nice, rich, caramelized look—kind of like they’re perfectly roasted. Next, you can do the bend test. Gently pick them up and see if they bend easily without cracking loudly; if they do, you’re on the right track.
Finally, you’ll want to check for tenderness with a probe or a toothpick. If it slides in easily with just a little resistance, then your ribs are good to go—completely cooked and tender!
Visual Color Changes
When checking if your ribs are ready, paying attention to their color can be a helpful clue. Color indicators and visual cues reveal a lot about doneness.
Look for a deep, caramelized hue on the surface, signaling the sugars caramelized during cooking. The bark should be firm and slightly glossy, indicating proper rendering of fat and connective tissue.
The meat underneath should have a pinkish hue near the bones, known as the smoke ring, which is a sign of good smoking. Keep an eye on these visual cues:
- A rich, dark, mahogany color on the surface
- Slightly crisp edges or bark formation
- Pinkish smoke ring around the meat near the bones
Bend Test Method
Gauging doneness by visual cues is helpful, but combining that with a tenderness test gives you a more reliable indication. To perform the bend test, pick up the rack with tongs or use grill accessories designed for handling hot ribs.
Gently lift the ribs from one end; if they bend easily and start to crack, they’re likely ready. Proper rib seasoning helps create a flavorful crust, but tenderness is what really shows they’re done.
Avoid overcooking, which makes the meat too soft and fall apart. This method works well with your favorite pellet grill because it offers consistent heat.
With practice, you’ll develop a feel for the right bend, ensuring perfectly cooked ribs every time.
Probe Tenderness Check
Using a probe tenderness check is one of the most reliable ways to see if your ribs are perfectly cooked. When you insert a probe into the meat, it should glide in easily, showing the ribs are tender and ready.
This method helps you avoid overcooking or undercooking, keeping the flavor infusions and moisture intact. Proper rib trimming before grilling can also make this test more effective by exposing the meat evenly.
Look for these signs: the probe slides in with little resistance, the meat feels soft but not mushy, and the bones may start to poke out slightly. These clues help you catch the perfect tenderness.
With this, you can ensure your ribs stay juicy, flavorful, and cooked just right every time.
Cooking Different Types of Ribs: Spare, Baby Back, and St. Louis
Different types of ribs require specific preparation and cooking techniques to get the best results. Spare ribs are larger and meatier, so they benefit from a longer cook time at lower temperatures.
Use a robust rib seasoning to boost their rich flavor, and consider a hearty sauce like smoky barbecue to complement their richness. Baby back ribs are smaller and leaner, cooking faster and often more tender.
A balanced rib seasoning works well here, and a lighter, tangy sauce helps highlight their delicate texture. St. Louis ribs are a trimmed version of spare ribs, offering a uniform shape that cooks evenly.
Apply a well-rounded rib seasoning and pair them with a slightly sweet or spicy sauce to bring out their smoky flavor. Adjust cooking times based on the rib type, but always aim for probe tenderness.
Proper seasoning and sauce pairing make each rib style shine, ensuring a delicious result every time.
Troubleshooting Common Ribs Cooking Issues on a Pellet Grill
When cooking ribs on a pellet grill, common issues like uneven doneness, dryness, or tough texture can happen if you’re not careful. To troubleshoot, start by checking your temperature settings—poor control can cause uneven cooking.
Make sure you’re using a good rib marinade to keep the meat moist and flavorful. Also, think about your grilling accessories; using a meat probe can help monitor internal temperature and prevent overcooking.
If your ribs turn out tough, they might need more time or indirect heat. Wrapping them in foil can help retain moisture. For dryness, baste occasionally or apply a finishing glaze.
Keep an eye on the smoke level because too much smoke can lead to bitter flavors. By adjusting these factors, you’ll avoid common pitfalls and get tender, juicy ribs every time.
Proper preparation and the right grilling accessories make all the difference in resolving these issues quickly.
Final Tips for Achieving Perfect Ribs Every Time
To consistently achieve tender, flavorful ribs, focus on fine-tuning your process with some final tips. First, pay close attention to your rib seasoning—use a balanced mix of salt, sugar, and spices to *improve* flavor without overpowering. Applying the seasoning evenly ensures every bite is flavorful.
Next, maximize smoke infusion by maintaining a steady pellet grill temperature and adding wood chunks or chips if desired. This boosts the smoky aroma and deepens the flavor. Remember to let your ribs rest for at least 10 minutes after cooking; this allows juices to redistribute for a juicier bite.
Keep an eye on your grill’s temperature and avoid opening the lid too often, which can disrupt the smoke and heat. With these tips, your ribs will consistently come out tender, smoky, and perfectly seasoned—making every cook a success.
Frequently Asked Questions
Can I Cook Ribs Directly on the Pellet Grill Grates?
Yes, you can cook ribs directly on the pellet grill grates, but proper meat prep is important. Set your grill to around 225°F for tender, flavorful results.
Remove the silver skin and apply your favorite rub before placing the ribs directly on the grates. This method lets the smoke flavor the meat evenly.
It’s a great way to get delicious, perfectly cooked ribs every time. Just keep an eye on the temperature to prevent overcooking.
Should I Use a Water Pan When Grilling Ribs?
In the age of smoky taverns, using a water pan can help maintain consistent humidity and prevent your ribs from drying out.
You should use a water pan when grilling ribs to improve tenderness and keep the meat moist.
It also helps regulate the cooking temperature, making sure the heat stays even.
Fill the pan with hot water and check it regularly to keep the humidity just right.
This way, you’ll get juicy, perfectly tender ribs every time.
How Do I Add Smoke Flavor During Cooking?
To add smoke flavor during cooking, you should use wood pellets that complement your ribs. These act as a natural flavor infusion.
You can also improve smoke by adding wood chunks or chips directly onto the grill’s heat source, fostering smoke enhancement.
Keep the lid closed as much as possible to trap the smoke, allowing the flavors to penetrate the meat effectively and ensuring you get that rich, smoky taste every time.
What Types of Wood Pellets Are Best for Ribs?
For mouthwatering ribs, choose wood pellets with flavor profiles that enhance your meat. Hickory and apple pellets are popular because they add smoky, sweet notes that make your ribs stand out.
Mesquite, on the other hand, offers a bold, intense flavor — perfect if you want a stronger smoky taste. The variety you pick can really transform your ribs from good to unforgettable.
Keep in mind, each pellet variety gives off a unique aroma. So, don’t be afraid to experiment and find the one that best complements your taste. It’s all about boosting your grilling game and making every bite memorable.
Is It Necessary to Pre-Soak My Wood Pellets Before Grilling?
You don’t need to pre-soak your wood pellets before grilling. Proper storage keeps them dry and maintains the right moisture level, helping them burn efficiently.
Soaking pellets can cause excess smoke and uneven burning, which can negatively affect your ribs. It’s best to keep your pellets in a dry, airtight container.
This way, you’ll get consistent heat and flavor every time. Good storage is key to keeping your pellets in top condition for grilling.
Conclusion
Mastering pellet grill ribs is like tending a delicate garden—you need patience, the right conditions, and attention to detail. Keep your grill temperature steady, trust the timing, and watch for those perfect visual cues.
With practice, you’ll turn each rack into a masterpiece that’s tender and flavorful. Remember, even the best gardens need time to flourish.
So give your ribs the patience they deserve, and you’ll enjoy delicious results every time.