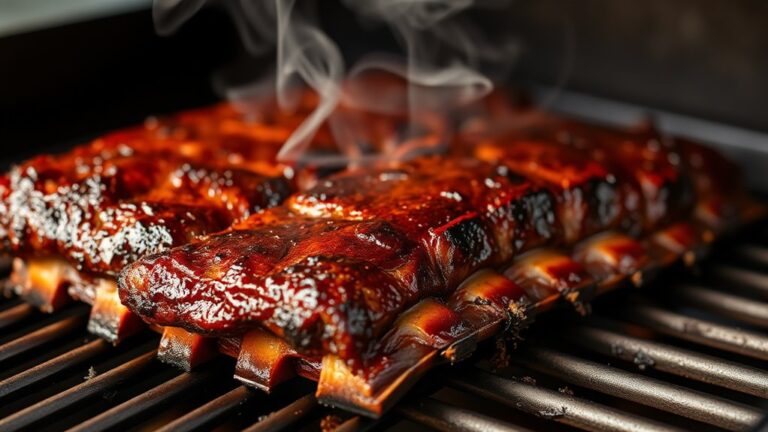
Mastering the Reverse Sear for Steak Perfection on a Pellet Grill
Cooking the perfect steak can be tricky, and many grilling enthusiasts struggle to get that ideal balance of juiciness and crust. If you’re tired of overcooked edges or underdone centers, you’re not alone. Mastering the reverse sear on a pellet grill is a game-changer for steak lovers everywhere.
To master the reverse sear on a pellet grill, start by choosing a thick, well-marbled steak and season it generously. Set your grill to 225°F, and cook the steak low and slow until it reaches your desired internal temperature.
Then, sear it in a hot cast iron skillet for a perfect crust. Pay attention to maintaining consistent heat and proper timing—doing so will guarantee juicy, even results every time.
Keep going for expert tips to enhance your steak game.
Key Takeaways
- Keep the grill temperature steady at around 225°F–250°F so the steak cooks evenly without rushing.
- Use a reliable meat thermometer to check the internal temp and make sure you hit your preferred level of doneness.
- Pat the steak dry before searing to help create a nice, deep crust and avoid steaming the meat.
- Preheat your cast iron skillet to a high heat, around 400°F–500°F, for a quick, flavorful sear.
- Let the steak rest after searing so the juices can redistribute, giving you maximum tenderness and flavor.
Why Reverse Sear Is the Best Method for Perfect Steaks
While many grilling methods can produce good steaks, the reverse sear stands out as the best way to get perfect results. It allows you to control the internal temperature precisely, making sure your steak is evenly cooked and tender.
Reverse searing guarantees perfectly cooked, tender, and evenly textured steaks every time.
Marinating beforehand boosts meat tenderness and adds extra flavor, making each bite more enjoyable. With reverse searing, you start by gently warming the steak at a low temperature, which helps break down connective tissues and keeps the moisture in.
Then, a quick finish on high heat creates a beautiful crust without overcooking the inside. This method reduces the risk of dry or tough meat, giving you a juicy, tender steak every time.
Plus, it’s easier to monitor doneness, so your steak reaches exactly the level you want. Overall, reverse searing combines flavor, tenderness, and precision for restaurant-quality steaks at home.
How to Choose the Right Steak for Reverse Searing
Choosing the right steak is key to getting great reverse sear results. Focus on the cut—thicker steaks like ribeye, filet mignon, or New York strip are perfect because they cook evenly and develop a nice crust.
Pay close attention to marbling. More intramuscular fat means more flavor and juiciness. Well-marbled steaks stay moist during the slow cooking phase, giving you a tender, flavorful interior.
Avoid very lean cuts since they can turn dry and lack richness. Look for steaks with consistent marbling throughout and choose cuts at least 1.5 to 2 inches thick for the best results.
Preparing Your Pellet Grill for Reverse Searing
Before you start reverse searing, it’s important to properly prepare your pellet grill to guarantee consistent heat and ideal results. Begin with good grill maintenance—clean out ash and residue to ensure optimal airflow and temperature control.
Check that your pellets are fresh, as quality pellets are key for consistent smoke infusion and flavor. Adjust your grill’s temperature settings to a low, steady range, typically around 225°F to 250°F, to create the right environment for gentle cooking before searing.
Keep a reliable thermometer handy to monitor internal temperatures accurately. Proper maintenance and setup help prevent hot spots and uneven heat distribution, which are essential for even doneness.
Moreover, ensure your pellet grill’s lid seals tightly to maintain smoke infusion, enhancing flavor. With these steps, your grill will be primed for perfectly controlled low-and-slow cooking, laying the groundwork for a flawless reverse sear.
How to Achieve Even Doneness With Low-And-Slow Cooking
Achieving even doneness during low-and-slow cooking depends on controlling heat distribution and understanding how your grill behaves. Start by cooking with wood to add a subtle smoke flavor without causing temperature fluctuations.
Maintain a consistent, low temperature—around 225°F—by adjusting your pellet grill’s settings. Using sous vide beforehand ensures your steak reaches a uniform internal temperature, helping prevent overcooking.
Once you’ve cooked the steak sous vide, finish it on the pellet grill at low heat to develop flavor and a slight smoke crust. Throughout the process, monitor the internal temperature with a reliable probe and avoid large swings.
If your grill has hot spots, rotate the steak periodically to promote even cooking. Patience is key—slow, steady heat allows heat to penetrate evenly, resulting in a perfectly cooked, tender steak with consistent doneness from edge to edge.
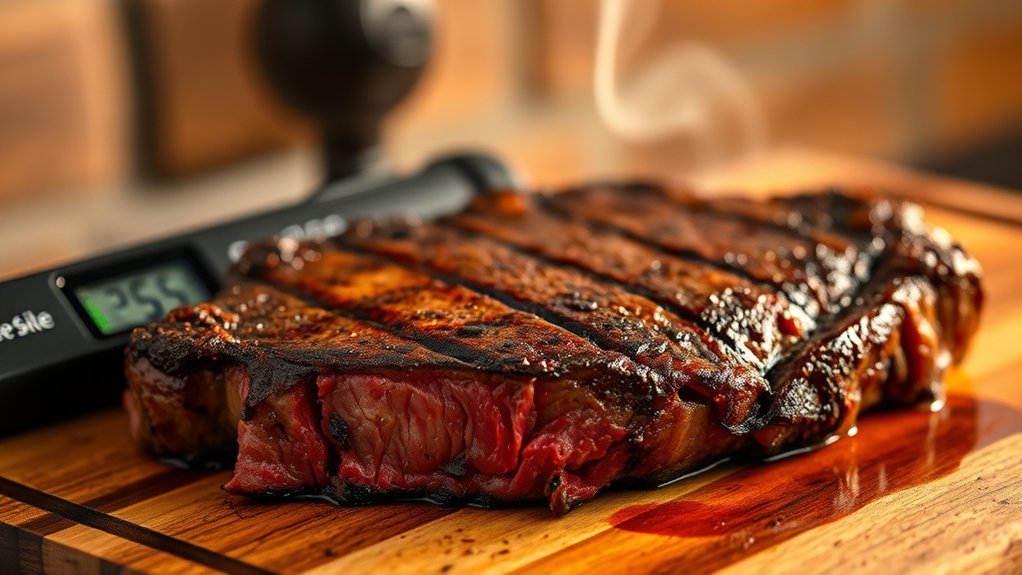
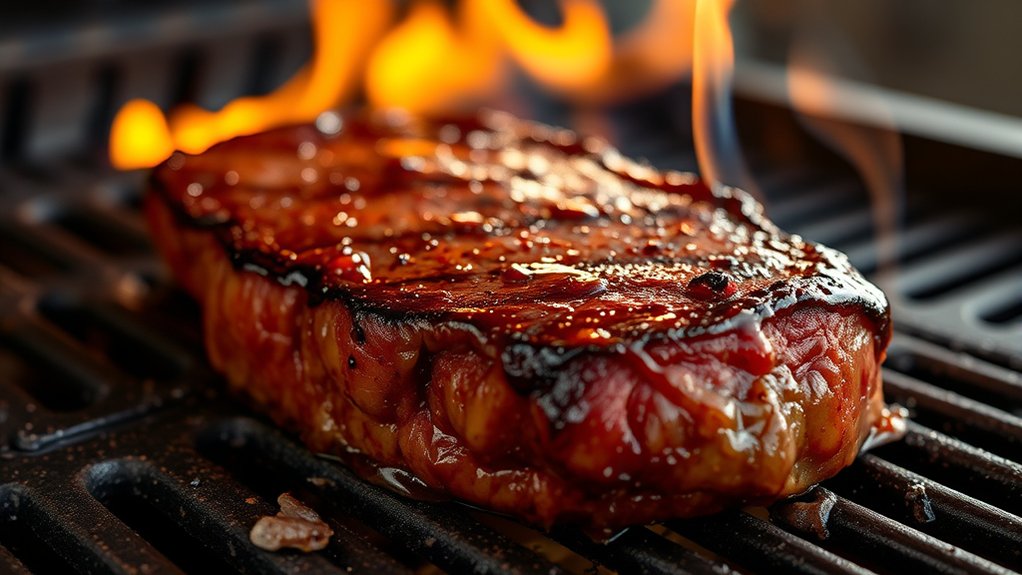
How to Sear Your Steak for a Beautiful Crust
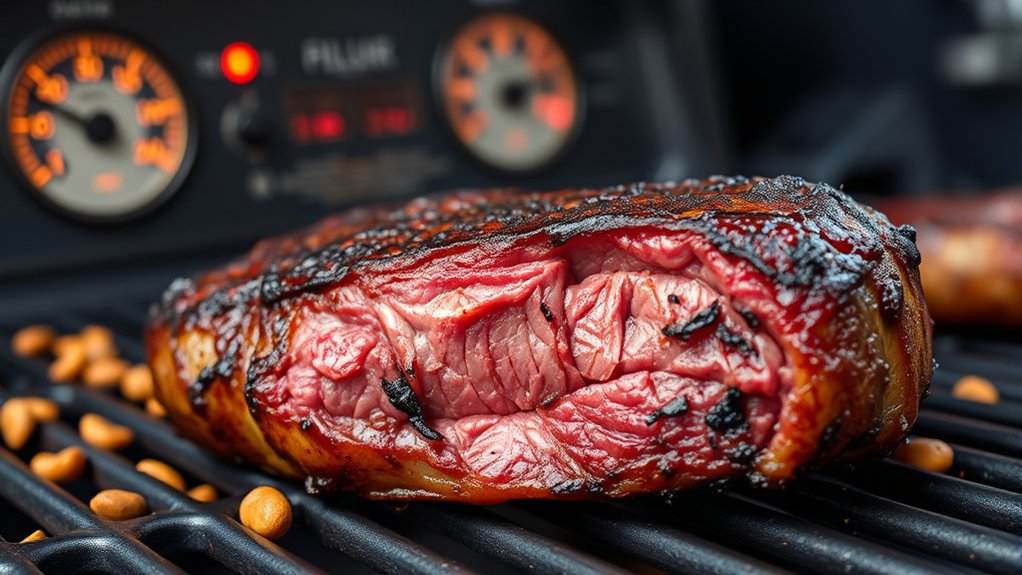
To get that perfect crust on your steak, start by preheating your skillet to a high temperature. Honestly, a cast iron skillet is your best bet here because it heats evenly and helps you get that nice sear.
Just be patient—don’t rush it! Let the crust form slowly and naturally. This way, you’ll end up with a beautifully caramelized finish that’s just mouthwatering.
Preheat to High Temperature
Heating your pellet grill to a high temperature is key for getting that perfect, caramelized crust on your steak. When preheating, make sure your grill is clean and well-maintained to avoid uneven searing and unwanted smoky flavors.
Proper meat storage also matters. Keep steaks in a cold, dry place to prevent spoilage and dryness, helping you get consistent results every time.
Here’s a quick guide:
| Step | Temperature Range | Tips |
|---|---|---|
| Preheat Grill | 450°F – 500°F | Allow 15-20 minutes for full heat |
| Maintain Heat | Consistent & high | Use a thermometer for accuracy |
| Clean Grill | After every use | Keep grates free of residue |
| Store Meat | Cold, dry place | Prevent spoilage & dryness |
Use a Cast Iron Skillet
Using a cast iron skillet is one of the best ways to develop a rich, caramelized crust on your steak. Its excellent heat retention allows for precise grill temperature control, ensuring even searing.
To maximize flavor, consider marinating your steak beforehand. This adds depth and complexity to the crust. When you’re ready to sear, make sure the skillet is hot—around 400°F to 500°F—before placing the steak in.
This quick, high-heat contact creates the Maillard reaction, resulting in a beautiful crust. For added sophistication, keep these tips in mind:
- Use a high-smoke-point oil like avocado or grapeseed for searing.
- Preheat the skillet thoroughly before adding the steak.
- Rest the steak briefly after searing for maximum juiciness.
Patience for Perfect Crust
Once your skillet is properly preheated, patience is your best friend for getting that perfect crust. Don’t rush the searing process; let the heat develop the Maillard reaction. While waiting, you can focus on marinating to boost flavor or sharpening your knife for clean cuts later.
Patience helps with even caramelization and keeps you from burning the steak. Keep an eye on the surface—resist the urge to flip too early. Use a timer if needed to stay on track. Remember, a good crust forms when you give it time, not just heat.
To save time, prepare your tools and ingredients beforehand. That way, everything flows smoothly. A perfect crust is all about controlled heat and patience, which results in a restaurant-quality steak that’s worth the wait.
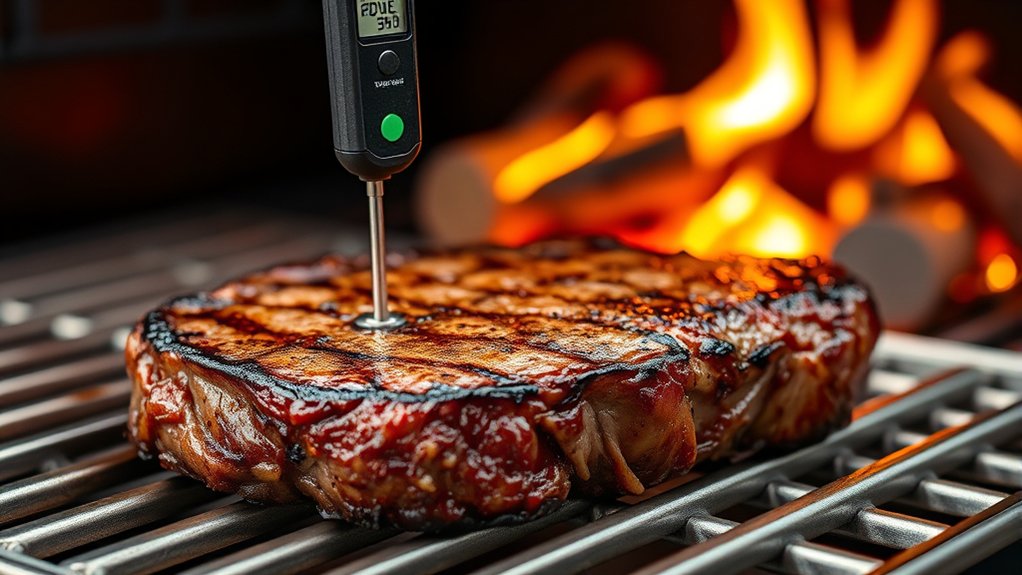
Tips for Monitoring Temperatures During the Reverse Sear
Monitoring temperatures accurately is essential for a successful reverse sear, as it guarantees your steak reaches the perfect doneness without overcooking. To do this, pay close attention to your cooking temperature and ensure proper thermometer placement. Accurate readings depend on positioning the thermometer probe correctly—avoid the fat cap and place it in the thickest part of the steak for the most reliable results. Use a high-quality digital meat thermometer for quick, precise readings.
Consider these tips for ideal temperature monitoring:
- Insert the thermometer probe into the center of the steak, avoiding bone or excess fat.
- Keep the thermometer cord away from direct heat to prevent false readings.
- Check the temperature frequently as you approach your target doneness, especially during the final reverse sear stage.
Consistent monitoring helps you achieve that perfect intermediate temperature, ensuring your steak is cooked to perfection.
Common Mistakes to Avoid When Reverse Searing
Even experienced grillers can stumble into common pitfalls when reverse searing a steak, which can jeopardize the final result. One major mistake is overcooking the meat, leading to a dry, tough steak. Keep a close eye on temperature to avoid this overcooking pitfall.
Another mistake is neglecting proper seasoning. Skipping this step results in bland flavor. Don’t assume salt and pepper are enough—consider a marinade or rub for more depth.
| Mistake | Consequence | Solution |
|---|---|---|
| Overcooking pitfalls | Dry, tough steak | Use a reliable thermometer |
| Seasoning oversights | Bland flavor | Season generously before cook |
| Ignoring resting time | Loss of juices and flavor | Rest steak before slicing |
Avoid these errors to ensure your reverse sear produces a perfectly cooked, flavorful steak every time.
Seasoning and Finishing Touches for Steak Perfection
To really bring out the best in your steak, make sure to season it evenly and confidently before you start cooking. Don’t be shy—get those spices and herbs all over the meat so every bite is packed with flavor.
Adding little touches like garlic, fresh herbs, or a splash of butter can take your steak to the next level. And when it’s almost ready, a quick sear or a nice glaze can lock in those juices and give it that irresistible finish.
Ideal Seasoning Techniques
Achieving the perfect flavor starts with the right seasoning technique, which enhances the steak’s natural richness without overpowering it. To elevate your reverse-seared steak, focus on balanced flavor infusions and well-crafted spice blends.
Keep it simple but effective, allowing the meat’s quality to shine. When applying seasonings, consider these techniques:
- Use a blend of herbs and spices that complement the beef’s natural flavors.
- Apply seasonings generously but evenly, letting them penetrate during resting.
- Finish with a light sprinkle of finishing salt to boost texture and add a subtle burst of flavor.
Enhancing Flavor Layers
Building layers of flavor is key to taking your reverse-seared steak from good to exceptional. Focus on seasoning techniques that deepen the taste without overpowering the meat’s natural richness.
Use a blend of salt, pepper, garlic powder, and herbs to create a well-rounded base. For extra depth, apply a light layer of spice rub or marinade before grilling so flavors can penetrate during the slow cook.
After searing, finishing touches like a brush of herb butter or a sprinkle of flaky sea salt can boost the steak’s aroma and flavor. These small steps add multiple flavor layers, making each bite more satisfying and balanced.
Perfect Finishing Methods
Once you’ve built a rich flavor base with your seasoning and initial layers, the finishing touches are what truly elevate your steak. Consider subtle enhancements like a pat of herb butter or a drizzle of balsamic glaze to add a final burst of flavor.
You might also explore marinade options that add depth, such as garlic-infused olive oil or soy-based marinades for umami richness. Pair your steak with thoughtfully chosen side dishes like creamy mashed potatoes, charred vegetables, or a crisp salad that complements without overpowering.
Finishing touches like freshly cracked black pepper or a sprinkle of finishing salt can really amplify the flavor. These small details bring sophistication and balance, making every bite memorable and perfectly crafted.
Troubleshooting Common Issues in Reverse Searing
Even with careful preparation, you might encounter some common issues when reverse searing steak on a pellet grill. One problem is uneven cooking, which often happens because of inconsistent heat zones. To fix this, make sure your grill’s temperature stays steady and your meat is placed correctly.
Ensure steady heat and proper placement to prevent uneven cooking when reverse searing steak on a pellet grill.
Another issue is overcooking the outside while the inside stays underdone. Using a reliable meat thermometer can help prevent this. Also, poor equipment maintenance can cause problems—dirty or malfunctioning grills may produce uneven heat or flare-ups.
Regularly clean your pellet grill and check parts like the firepot and auger. Always handle hot surfaces carefully to stay safe, and avoid cross-contamination. If your steak isn’t searing properly, verify your grill’s temperature settings and the condition of your heating element.
Troubleshooting these common issues helps keep your reverse sear process smooth. It ensures consistent results and a perfectly cooked steak every time.
Serving and Enjoying Your Perfectly Searred Steak
After achieving that perfect sear on your steak, it’s time to enjoy the fruits of your labor. Present your steak confidently, slicing it against the grain for maximum tenderness. To elevate your experience, consider a wine pairing—rich red wines like Cabernet Sauvignon or Malbec complement the robust flavor of the seared meat.
When selecting side dishes, aim for balance. Roasted vegetables, garlic mashed potatoes, or a fresh mixed greens salad add variety without overpowering the steak’s flavor. To make the meal feel more sophisticated, keep these tips in mind:
Serve the steak on a warmed plate to keep it hot. Garnish with fresh herbs like thyme or rosemary for added aroma.
Pair your wine and sides thoughtfully to create a harmonious dining experience. Enjoy your perfectly seared steak with confidence, savoring each bite and the thoughtful pairing choices.
Frequently Asked Questions
Can I Reverse Sear Thinner Steaks Effectively?
Yes, you can reverse sear thinner steaks effectively. With a thinner steak, you’ll want to lower your grill temperature to gently cook it first, avoiding overcooking.
Then, increase the heat for a quick, high-temperature sear to develop that perfect crust. Keep a close eye on the internal temperature since thinner steaks cook faster.
This method guarantees even doneness and maximum flavor, even for smaller cuts.
How Long Should I Rest the Steak After Reverse Searing?
You should rest your steak for about 5 to 10 minutes after reverse searing. This rest lets the juices redistribute evenly throughout the meat, making it juicier.
If you cut into it too soon, the juices may escape, leaving your steak dry. Cover it loosely with foil during this time to help retain the heat.
Proper resting improves both the flavor and tenderness, so your reverse seared steak turns out perfect.
Is Reverse Searing Suitable for All Types of Pellet Grills?
Imagine your pellet grill as a versatile artist’s palette, ready to craft perfect steaks. Reverse searing works well on most pellet grills, but for the best results, make sure your grill maintains consistent heat and smoke levels.
Proper grill maintenance not only improves flavor infusion but also helps ensure even cooking. While some models might have limitations, paying attention to your grill’s capabilities is key.
With a little care, you’ll be able to achieve delicious, restaurant-quality steaks every time, no matter what equipment you’re using.
What Wood Pellets Work Best for Reverse Searing Steaks?
You should use wood pellets that match your marinade choices and the thickness of your steak. Hickory or oak pellets are great for richer flavors, especially if your marinade has bold spices.
Fruit woods like apple or cherry add a subtle sweetness that works well with thinner steaks. Always pick your pellet type based on your marinade and steak size to get the best flavor during reverse searing.
Keep experimenting to find what works best for you and enjoy your perfectly flavored steaks!
How Do I Adjust Cooking Times for Different Steak Thicknesses?
To modify cooking times for different steak thicknesses, start by considering marbling effects, which influence cooking speed. Thicker steaks need more time at your target cooking temperature to ensure even doneness.
Use a meat thermometer to monitor internal temperature and make adjustments as needed. For thicker cuts, sear longer or increase the reverse sear phase.
Thinner steaks require shorter cooking times to prevent overcooking, so keep an eye on the clock and temperature.
Conclusion
Now that you’ve mastered the reverse sear, every steak you cook will be perfectly done and beautifully crusted.
It’s funny how a little patience and the right technique can really level up your grilling skills, isn’t it?
With your pellet grill ready and your skills sharpened, you’re all set to impress friends and family.
Just remember, the best steaks often come from those simple, well-executed steps you’ve learned.
Enjoy every delicious bite of your perfectly reverse-seared steak!