10 Simple Steps to Cook Baby Back Ribs on a Gas Grill
Many barbecue enthusiasts dream of perfectly cooked baby back ribs, but getting that tender, flavorful meat can feel intimidating. You’re not alone—many people struggle with achieving that smoky, melt-in-your-mouth texture at home.
Luckily, mastering the art of grilling ribs on a gas grill is easier than you think.
Start by removing the membrane and trimming excess fat from the ribs, then season generously with your favorite dry rub or marinade. Preheat your gas grill to about 400°F, clean the grates, and set up for indirect heat by turning on one or two burners.
Cook the ribs low and slow at 225-275°F, wrapping them in foil with liquids like apple juice for extra tenderness.
During the last minutes, glaze and char the ribs for a smoky finish. To master the process, follow these simple steps carefully.
Key Takeaways
- Remove the membrane and trim excess fat, then season the ribs generously with your favorite dry rub or marinade.
- Preheat your gas grill to 400°F, clean the grates, and set up for indirect heat by turning on one or two burners.
- Wrap the seasoned ribs in foil with a splash of liquid like apple juice, then cook low and slow at 225-275°F.
- During the last 30 minutes, apply a glaze every 10-15 minutes and check for doneness by tenderness and internal temperature.
- Rest the ribs for 10-15 minutes, then finish with a quick high-heat sear for a smoky, charred exterior before serving.
How to Prepare Baby Back Ribs Before Grilling
Before you start grilling, you need to properly prepare your baby back ribs. Rib preparation begins with removing the thin membrane on the bone side of the ribs. Use a paper towel to grip it and peel it away smoothly. This step helps your seasoning penetrate better and makes the ribs more tender.
Next, trim any excess fat or loose meat for even cooking. Season your baby back ribs generously with a dry rub or marinade of your choice, focusing on both sides. Let the ribs sit for at least 30 minutes to absorb the flavors, but overnight is even better.
Proper rib preparation also involves bringing the ribs to room temperature before grilling, which promotes even cooking. By following these steps, you’ll set a strong foundation for perfectly cooked, flavorful baby back ribs on your gas grill.
Getting Your Gas Grill Ready for Ribs
Before you get started with cooking, it’s a good idea to clean your grill grates. This helps prevent sticking and makes sure the heat distributes evenly. Nobody wants ribs that stick or cook unevenly, right?
Next, make sure to preheat your grill to the right temperature. This step is key to cooking the ribs consistently and building that amazing flavor. When your grill’s at the right temp, those ribs will turn out tender, juicy, and perfectly cooked.
Getting these simple steps done first really sets you up for success and results in some seriously delicious baby back ribs!
Clean Grill Grates
A clean grill is key to perfectly cooked baby back ribs because it helps prevent sticking and ensures even heat. Regular maintenance keeps your grates free of residue and rust, which can affect smoke flavor and overall performance.
Before you start cooking, scrub the grates with a wire brush or scraper to remove debris and charred bits. This step makes sure your ribs won’t stick and that the smoke flavor develops evenly.
| Benefit | Action |
|---|---|
| Improve Smoke Flavor | Clean grates let better smoke absorption |
| Prevent Sticking | Remove buildup for easy flipping |
| Ensure Even Heat | Keeps cooking temperature steady |
Keeping your grill spotless not only improves flavor but also makes cooking easier.
Preheat for Even Cooking
Once your grill grates are clean, it’s time to get the heat just right. Preheating ensures even cooking and helps lock in marinade flavors. Set your gas grill to medium-high heat, aiming for around 400°F.
This step is key for keeping your grill safe and avoiding hot spots that could burn your ribs. Close the lid during preheating to spread the heat evenly.
Check the temperature with a grill thermometer and keep the lid on while preheating. This helps preserve heat and prevents flare-ups.
Preheating creates a stable cooking environment, so your ribs cook uniformly and keep that delicious marinade flavor. Proper prep now makes all the difference in juicy, tender results.
Choosing and Applying the Perfect Rub and Marinade
Choosing the right spices really can make all the difference when you’re making ribs. It’s about finding that perfect blend that brings out the best in the meat and sets the foundation for a tasty meal.
When it comes to applying marinade, just make sure you coat the ribs evenly so every bite is packed with flavor. And don’t rush it—let the meat sit in the marinade long enough to really soak up all those delicious flavors. With the right prep, your ribs will turn out tender, flavorful, and just begging to be grilled.
Selecting the Right Spices
Selecting the right spices is essential to creating a flavorful rib experience. Your choice of spice blends will define the flavor profiles you want—whether smoky, sweet, spicy, or savory. Focus on balancing bold and subtle notes to amplify the meat’s natural flavor.
Consider these tips: Use a mix of sweet, spicy, and earthy spices to create complex flavor profiles. Adjust spice amounts based on your preferred intensity; use less for subtlety and more for punch.
Incorporate ingredients like paprika, cumin, or chili powder to add depth and warmth. Choosing the right spices helps you craft a personalized rub that boosts your ribs.
Applying Marinade Properly
After you’ve picked the right spices, it’s time to focus on applying your marinade or rub properly to get the most flavor. Start with high-quality ingredients like garlic, soy sauce, honey, or citrus that go well with your ribs.
Use techniques like massaging the marinade into the meat and making sure all surfaces are coated evenly. Place the ribs in a sealed bag or covered dish so the marinade reaches every nook.
Let the ribs marinate for at least a few hours, or ideally overnight, to boost tenderness and flavor. Remember to keep the meat refrigerated during marinating and flip the ribs now and then for even absorption.
Proper application makes all the difference in achieving juicy, flavorful ribs.
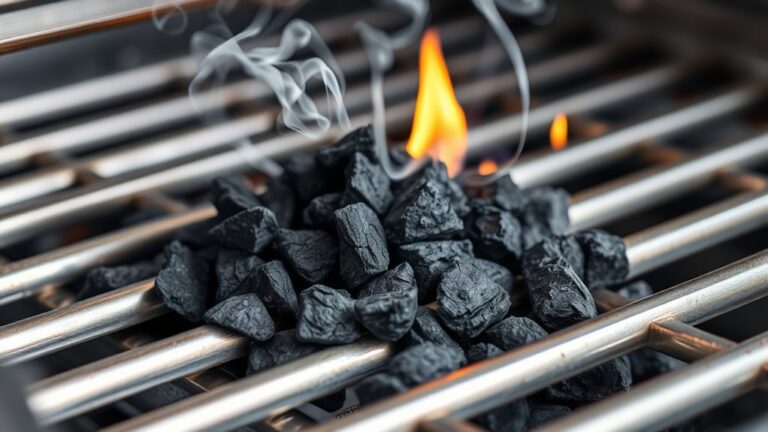
How to Set Up for Indirect Grilling on Gas
To set up your gas grill for indirect cooking, start by turning on only one or two burners on one side of the grill while leaving the others off. This creates a heat zone away from the direct flame, which is perfect for slow-cooking ribs.
Turn on one or two burners on one side for indirect heat—ideal for slow-cooking delicious ribs.
Make sure your grill is clean and free of grease to prevent flare-ups. This is really important for safety. Before placing your ribs, store them properly—keep raw meat refrigerated until you’re ready to cook. Use separate utensils to avoid cross-contamination.
Use a drip pan beneath the ribs to catch juices and prevent flare-ups. Check that the grill lid seals tightly to maintain consistent heat. Keep a spray bottle of water nearby to tame any unexpected flare-ups.
This setup promotes even cooking and helps you achieve tender, flavorful ribs without direct heat.
Keeping the Grill at the Right Temperature
Maintaining a steady temperature on your gas grill is key to perfectly cooked ribs. Consistent heat helps the meat cook evenly and stay tender.
Set your grill to a low or medium-low heat, around 225-275°F, and check the built-in thermometer often. Keep the lid closed as much as possible to maintain the temperature and keep things safe.
Adjust the burners if needed, turning them down or off to keep the heat stable. Using indirect heat zones can help avoid flare-ups and hot spots that might burn your ribs.
Terms like “temp zones” and “plate setup” can guide your adjustments for better results. Keeping the temperature steady reduces the risk of overcooking or undercooking.
This approach ensures your ribs come out flavorful and perfectly cooked. Consistent heat control is the secret to grilling ribs to perfection.
Wrapping Ribs for Tenderness: Foil or Other Methods
Wrapping ribs is a great way to make them tender and juicy. Most people tend to use foil for this because it’s so effective—it traps moisture and helps speed up the cooking process. The result? Ribs that are fall-off-the-bone tender and full of flavor.
But hey, if you’re feeling a bit adventurous, there are other options too. You might try using butcher paper if you want a different texture or a bit more smoky flavor. And for those who prefer a no-wrap approach, you can cook the ribs uncovered or with a different technique altogether. Each method gives you a unique result, so it’s fun to experiment and find what you like best.
Advantages of Foil Wrapping
Using foil to wrap ribs during cooking offers several key advantages. First, it helps retain moisture, making the ribs tender and juicy. The foil traps steam and heat, which helps break down connective tissues more effectively.
This method also speeds up cooking time and ensures even heat distribution. When choosing wrapping techniques, foil acts as a barrier that prevents the ribs from drying out or burning, especially during long cooks.
You can also add flavorful liquids like apple juice or bourbon inside the foil for extra taste. Overall, foil wrapping simplifies the process, resulting in tender, flavorful ribs with minimal fuss.
It’s a reliable technique that elevates your grilling experience and guarantees delicious, fall-off-the-bone results.
Alternative Wrapping Techniques
While foil is a popular choice for wrapping ribs, there are other effective methods to achieve tenderness and flavor. Alternatives include using butcher paper, banana leaves, or silicone mats. These options help keep moisture in while allowing some smoke to get through, which boosts flavor.
You can also get creative with flavor infusions by adding herbs, spices, or fruit slices directly into the wrap. For example, wrapping ribs with apple slices and rosemary adds sweetness and aroma, while banana leaves give a subtle earthiness.
Here’s a quick comparison:
| Technique | Benefits | Ideal For |
|---|---|---|
| Butcher Paper | Breathable, retains moisture | Juicy, tender ribs |
| Banana Leaves | Adds aroma, natural flavor | Tropical-inspired ribs |
| Silicone Mats | Reusable, easy cleanup | Consistent, mess-free wraps |
| Foil | Moisture retention | Traditional tenderness |
| Parchment Paper | Gentle steaming, flavor infusion | Light, delicate ribs |
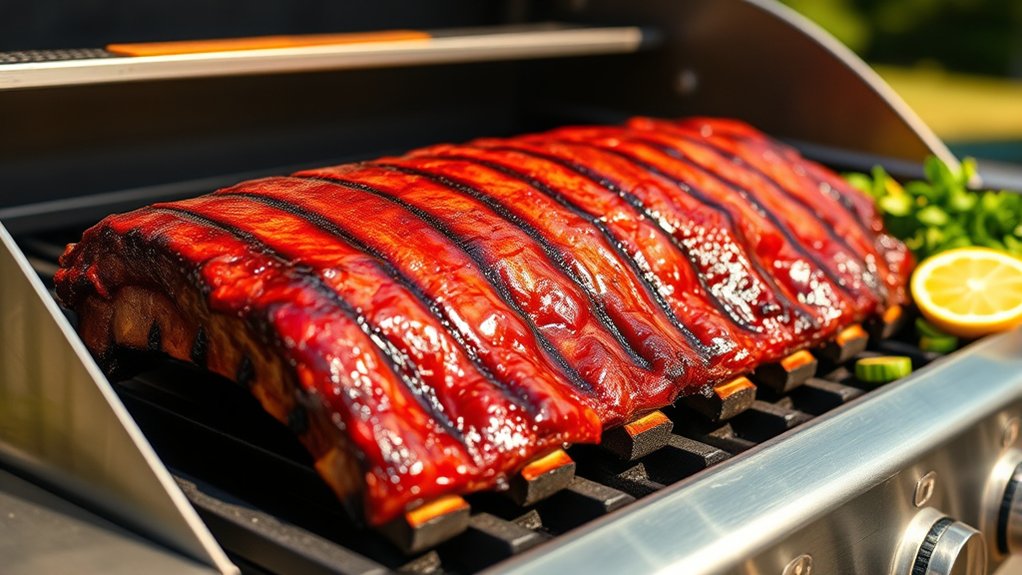
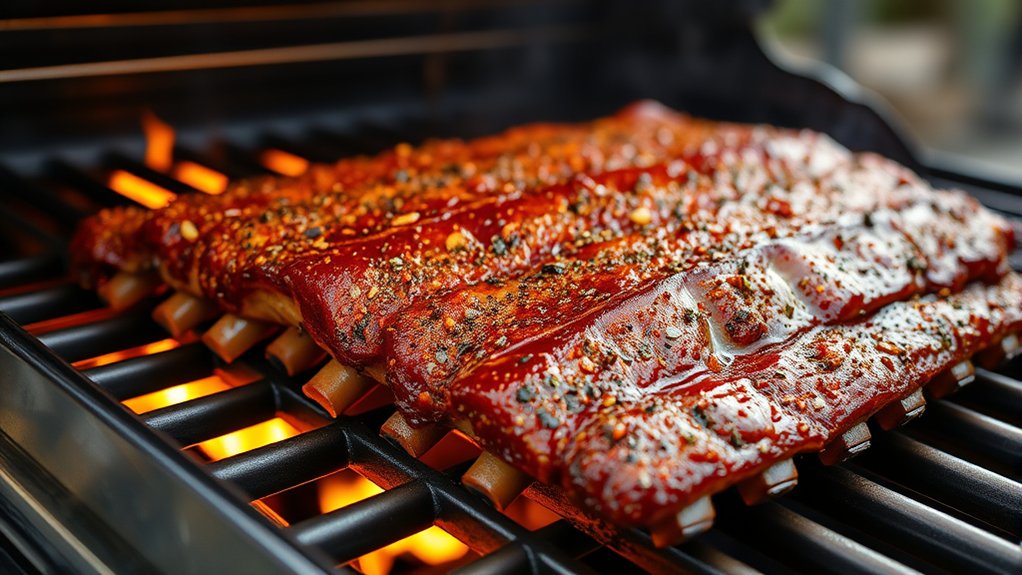
Glazing and Basting for Juicy, Flavorful Ribs
Glazing and basting are crucial steps to keep your baby back ribs juicy and flavorful. These techniques infuse the meat with taste and help retain moisture.
Use a tasty glaze or marinade to add richness. During the last grilling stages, apply a thin layer of glaze every 10-15 minutes to create a sticky, flavorful crust.
Basting with juices or marinade keeps the ribs tender and moist, preventing them from drying out. Just be careful not to overdo it, as too much basting can overpower the natural flavor of the meat.
Keep your basting brush or spoon clean and use it for even coverage. Applying thin layers of glaze will give you a balanced flavor and a nice shine.
Reapply the glaze regularly to build a delicious, glossy finish that’s full of flavor.
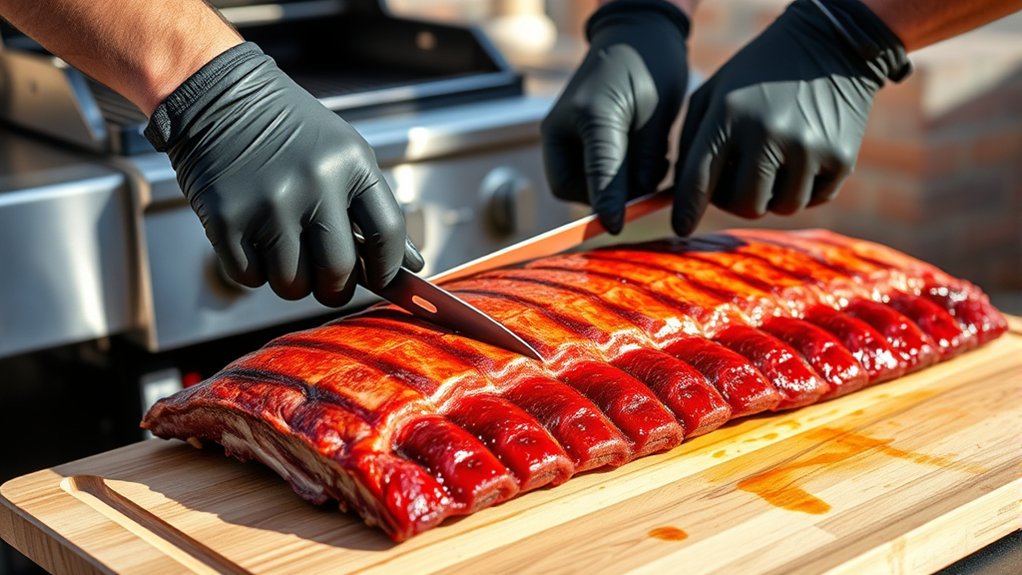
How to Check If Your Ribs Are Done and When to Rest
After applying glaze and basting to develop that glossy, flavorful crust, it’s important to check when your ribs are perfectly done. To do this, look for tender meat that pulls back from the bones and a meat temperature around 190-205°F.
You can also test by gently twisting a rib; if it separates easily, it’s ready. Rest your ribs for 10-15 minutes to let the juices redistribute, which keeps the meat moist and flavorful.
Proper storage can improve flavor too. Keep leftover ribs in airtight containers, and reheat them slowly for the best results. For different flavors, try marinades like apple cider vinegar or honey-based mixes.
Here’s a quick guide:
| Indicator | What to Look For |
|---|---|
| Visual | Meat pulls back from bones |
| Temperature | 190-205°F |
| Texture | Meat is tender, separates easily |
| Resting | 10-15 minutes before slicing |
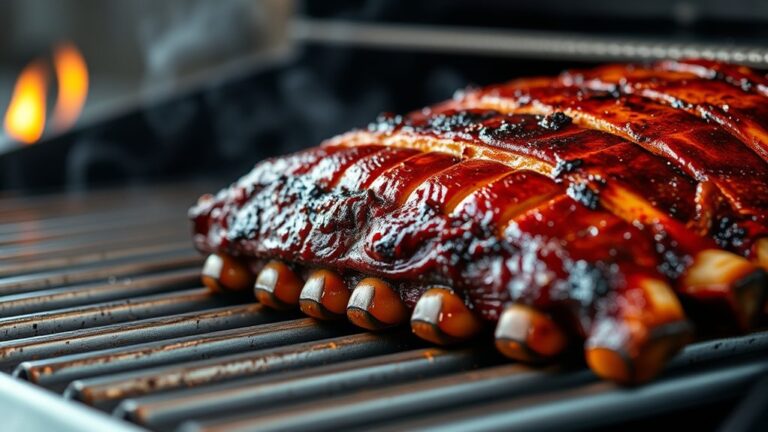
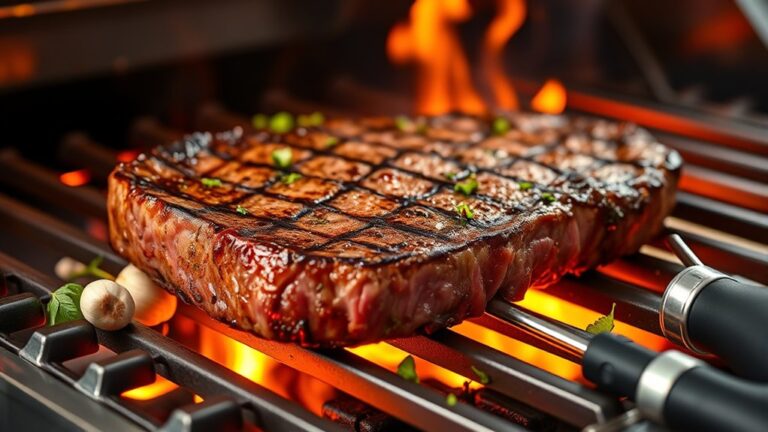
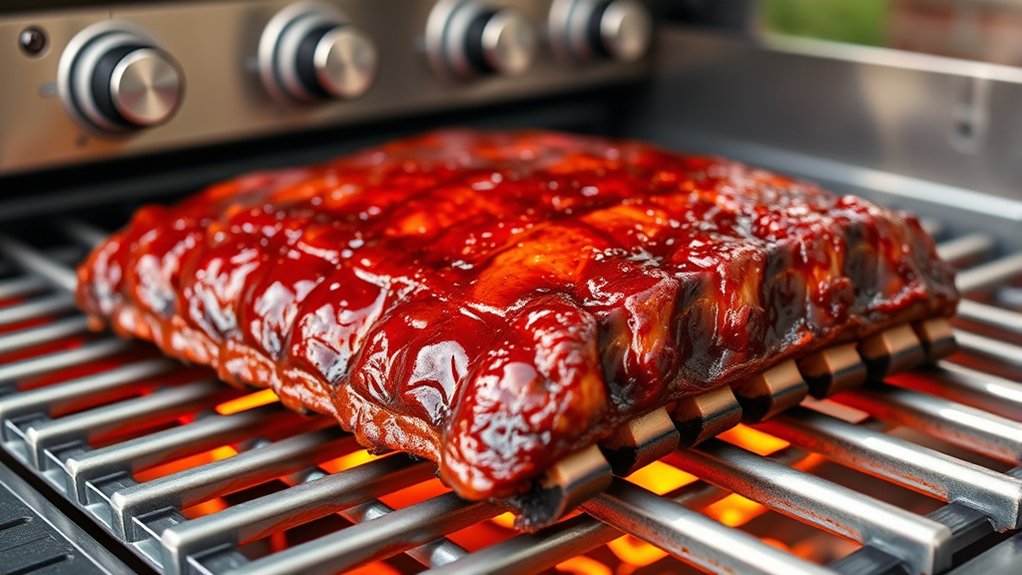
Finishing Touches: Achieving a Charred, Smoky Exterior
To give your ribs that irresistible charred, smoky exterior, you need to bring the heat towards the end of cooking. This step is vital for perfect barbecue techniques that impress.
Use your grill’s high heat or open the lid briefly to sear the ribs, creating a caramelized crust. Keep a close eye to avoid burning.
To improve the effect, consider using grilling accessories like a cast-iron skillet or a grilling basket for better control and even charring.
Remember, the key is quick, direct heat. Don’t linger too long or you’ll risk overcooking.
This final touch adds depth and a smoky flavor that makes your ribs stand out.
Use a quick, intense heat blast at the end of grilling. Keep grilling accessories handy for precise control.
Watch closely to prevent burning and over-charing.
Serving Tips and How to Keep Ribs Warm Before Eating
Once your ribs are cooked to perfection, it’s important to serve them at the right temperature to enjoy their full flavor and tenderness. For the best presentation, arrange the ribs neatly on a platter, and you can garnish with herbs or a sprinkle of paprika for a pop of color.
To keep your ribs warm before eating, wrap them in foil and place them in a low-temperature oven, around 200°F. If you have a warming drawer, that works too. This helps maintain heat without drying out the meat.
Avoid leaving your ribs exposed to air for too long, as they can cool quickly. Keeping them covered and at a gentle warmth ensures they stay juicy and delicious until you’re ready to serve.
| Tip | Explanation |
|---|---|
| Ribs storage | Wrap tightly in foil or keep in a warm oven to stay warm. |
| Serving presentation | Arrange on a platter and add garnishes for an appealing look. |
| Keep warm tips | Use foil and low heat to prevent drying out. |
| Timing | Serve within 15-20 minutes for the best tenderness. |
Frequently Asked Questions
What Types of Wood Chips Can Enhance Gas Grill Ribs?
You can improve your gas grill ribs with various wood chip varieties like hickory, apple, cherry, or mesquite. These wood chips add unique flavors that complement the meat.
Use smoking techniques such as soaking the chips beforehand and placing them in a smoker box or foil pouch. This guarantees a steady smoke, infusing your ribs with rich, delicious smoky notes that boost your grilling experience.
How Long Can Cooked Ribs Be Stored Safely in the Fridge?
Time flies when you’re enjoying your ribs! You should store cooked ribs in the fridge for up to 3 to 4 days to guarantee food safety.
Proper meat storage is vital to prevent spoilage and bacteria growth. Wrap them tightly in foil or store in an airtight container.
Always reheat thoroughly before eating leftovers, and if in doubt, it’s better to be safe than sorry. Discard any ribs that smell off or look questionable.
Can I Cook Baby Back Ribs Entirely on a Gas Grill Without a Smoker?
Yes, you can cook baby back ribs entirely on a gas grill without a smoker. Start with marinade techniques to infuse flavor and apply rib seasoning generously before grilling.
Use indirect heat to cook the ribs slowly, ensuring tender, smoky results without a smoker. Cover the grill, maintain a steady temperature, and baste occasionally.
This method yields juicy, flavorful ribs with a delicious exterior, mimicking the smoked taste you’re after.
What Are Common Mistakes to Avoid When Grilling Ribs?
You should avoid common mistakes like over-marinade, which can make ribs mushy, and rushing sauce application, leading to burnt or uneven coating.
Use proper marinade techniques by marinating ribs for a few hours, not overnight, to improve flavor without compromising texture.
Also, apply sauce during the last few minutes of grilling to prevent burning.
Maintaining consistent heat and turning ribs regularly helps achieve tender, flavorful results without mistakes.
How Do I Reheat Leftover Ribs Without Drying Them Out?
Reheating leftover ribs is like gently reviving a sleeping beauty. To keep them juicy, use methods that help retain moisture, like wrapping the ribs in foil with a splash of broth or water.
Then, warm them slowly in the oven at 250°F or in a skillet on low heat. Avoid high heat, which can dry out the meat, and baste occasionally to keep each bite tender and flavorful.
Conclusion
Now that you’ve mastered the art of grilling baby back ribs, you’re ready to impress, savor, and enjoy every tender, smoky bite.
From preparation to finishing touches, you’ve learned to cook with confidence, balance flavors, and perfect your technique.
So, gather your ingredients, fire up your grill, and *welcome* the joy of creating mouthwatering ribs.
These ribs will bring everyone to the table to share, celebrate, and indulge in delicious reward.