7 Steps to Cook Ribs Perfectly on a Gas Grill
Cooking perfect ribs on a gas grill can be a challenge, especially if you’re aiming for that tender, flavorful result everyone loves. Many people struggle with getting the timing just right or maintaining the right temperature, but you’re not alone. With a little guidance, you can master the art of grilling ribs that will impress every time.
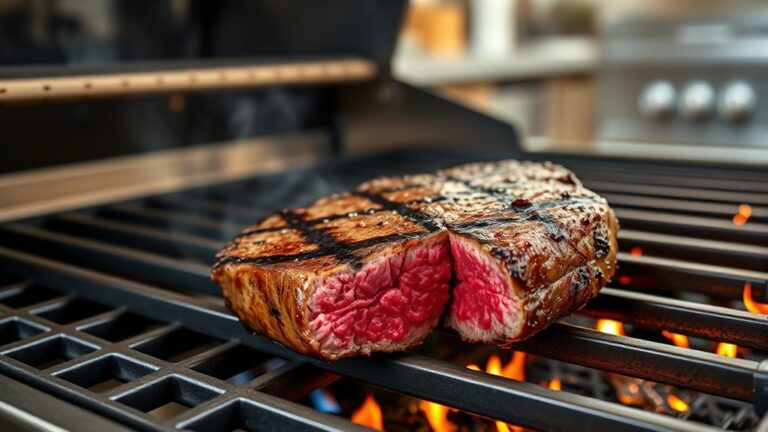
To cook perfect ribs on a gas grill, start by selecting quality meat with good marbling and preparing it at room temperature. Set up your grill for indirect heat by creating a hot side and a cooler side. Apply your favorite rub and marinade, then cook the ribs low and slow at 225°F to 250°F for about 3-4 hours.
Wrap and rest the ribs to lock in juices, then add sauce and grill for attractive marks. Keep going for more tips to achieve juicy, flavorful ribs.
Key Takeaways
- Select ribs with good marbling and regional flavor influences, then let them rest at room temperature before grilling.
- Set up a two-zone fire on your gas grill: a hot side for searing and a cooler side for indirect cooking.
- Apply a flavorful rub or marinade, then cook the ribs on the indirect heat side at 225-250°F for 3 to 4 hours.
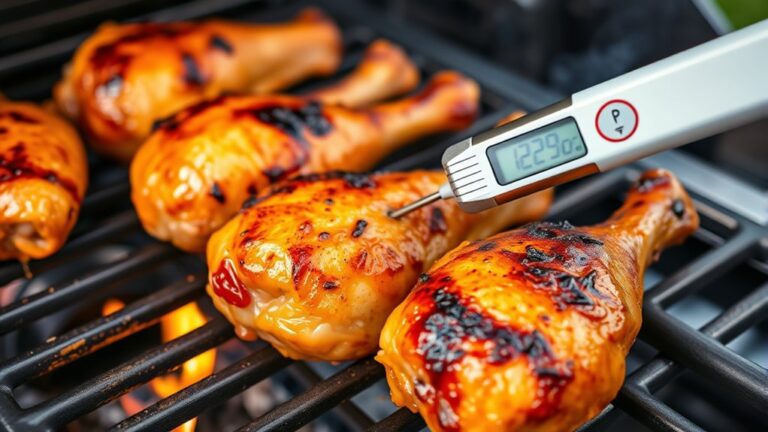
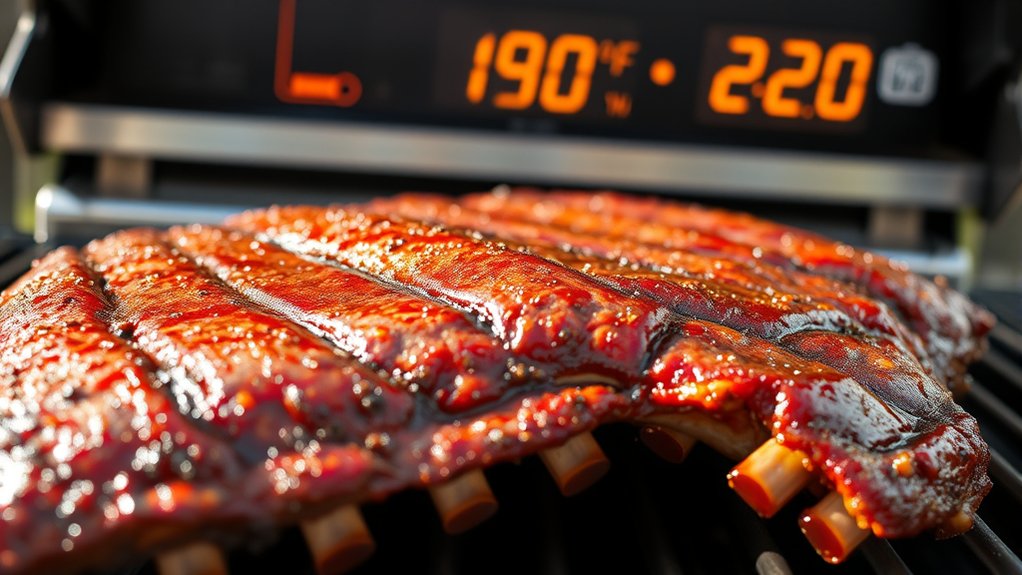
- Use a meat thermometer to ensure an internal temperature of 190-203°F and baste with sauce during the final minutes.
- Rest the ribs wrapped in foil for 10-15 minutes before slicing to keep them juicy and flavorful.
How to Select and Prep Ribs and Your Grill for Cooking
Choosing the right ribs and preparing your grill properly are key steps to grilling perfect ribs. When picking ribs, think about regional flavors that influence taste, like smoky Texas-style or sweet Kansas City cuts.
Select ribs with regional flavor influences and prepare your grill for optimal, even cooking.
Look for ribs with good marbling and a fresh look. This not only improves flavor but also adds healthy fats and protein to your meal. Before grilling, clean your grates thoroughly and set up a two-zone fire—hot on one side, cooler on the other.
This setup lets you sear the ribs first, then cook them indirectly to prevent burning. Rest the ribs at room temperature for about 30 minutes before grilling to ensure even cooking.
Also, consider the regional flavors you want to highlight. This will guide your choice of wood or charcoal. Proper selection and prep create the perfect foundation for tender, flavorful ribs that match your taste and style.
Choosing the Best Rub and Marinade for Flavorful Ribs
To infuse your ribs with bold, memorable flavor, choosing the right rub and marinade is key. The best flavor combos balance savory, sweet, spicy, and tangy notes, enhancing the meat without overpowering it.
When selecting a marinade, think about techniques that help flavors penetrate deeply. Marinate for a few hours or overnight for the best results.
A good rub might include paprika, garlic powder, brown sugar, cumin, and black pepper to create a tasty crust. For marinades, try mixing soy sauce, honey, apple cider vinegar, and chili flakes to add complexity.
Experimenting with different flavor combinations can turn simple ribs into a culinary masterpiece. The main thing is to match your rub and marinade to your taste and complement the natural pork flavor.
This way, you’ll get juicy, flavorful ribs every time.
Setting Up Your Gas Grill for Indirect Cooking
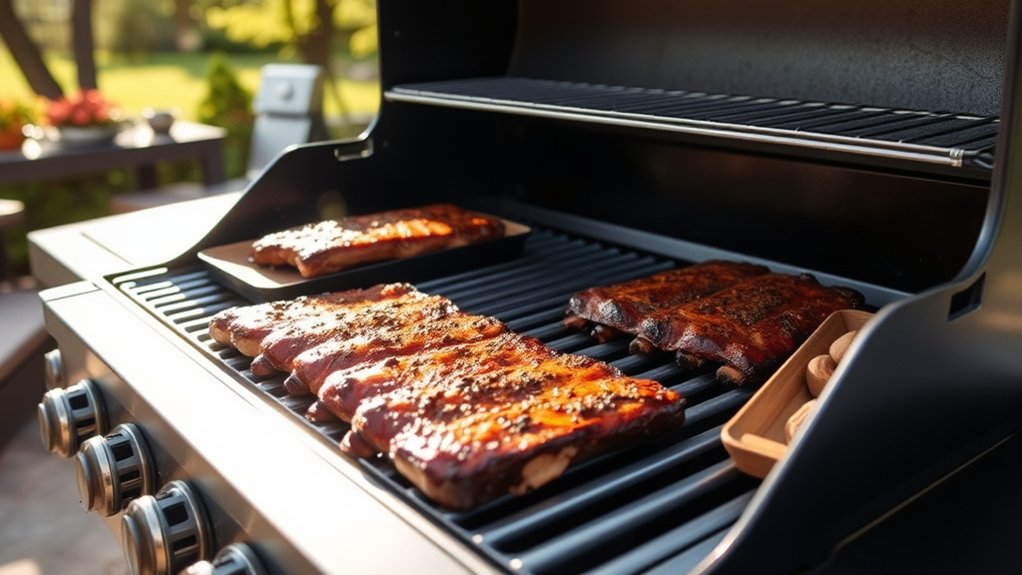
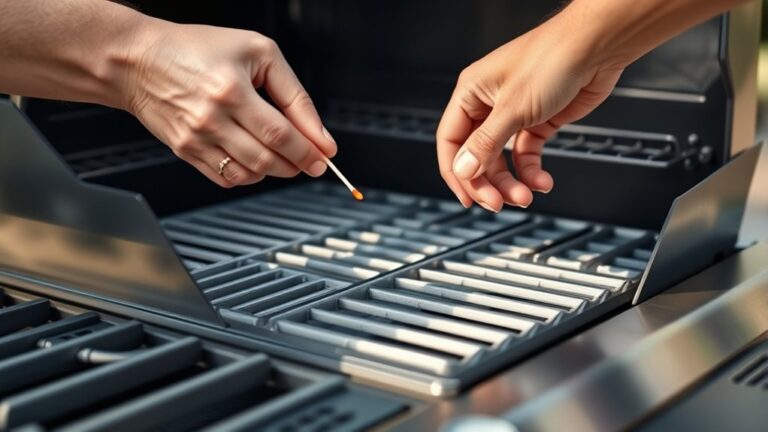
First things first, you’ll want to preheat your grill so everything heats evenly. To do this, arrange your burners so that one side is lit while the other stays off. This way, you create a nice indirect heat zone. It’s perfect for cooking your ribs slowly without exposing them directly to the flames, which helps make the meat tender and full of flavor.
Preheat Grill Properly
Before you start cooking your ribs, it’s essential to preheat your gas grill properly. Preheating makes sure your grill hits the right temperature for indirect cooking, keeping your ribs tender and juicy.
It also helps prevent flare-ups and hot spots, making your grill safer to use. To preheat, turn on your burners to medium or low, then close the lid and let it heat for about 10-15 minutes. This ensures even heat distribution.
Don’t forget to clean the grates beforehand—it helps with better flavor and easy removal later. Proper preheating also prevents sticking, making your ribs easier to handle.
Keep an eye on the temperature with a built-in or external thermometer to keep the heat steady throughout cooking.
Arrange Burners Strategically
Arranging your burners strategically is key to creating a consistent indirect heat zone for your ribs. This setup helps you control the temperature and prevent flare-ups, so your meat cooks evenly.
Before firing up your grill, check that everything’s clean—burners and grease traps. A clean grill maintains steady heat and makes cooking easier.
To set up, turn on one side’s burners and leave the other off. This creates a cool zone perfect for indirect cooking. It also helps spices develop flavor without direct heat.
Use the chart below for quick reference:
| Burner Position | Heat Level | Purpose |
|---|---|---|
| Left Side | Low/Off | Indirect heat zone |
| Right Side | High | Direct grilling if needed |
| Middle | Off | Safe zone for resting |
| Bottom Vent | Adjust | Airflow control |
Proper arrangement improves your grill’s performance and helps keep temperatures steady.
Use Indirect Heat Zones
Have you ever wondered how to cook ribs evenly without burning them? Using indirect heat zones on your gas grill is the key. By turning on only some burners and leaving others off, you create a cool, indirect cooking area perfect for tender, flavorful ribs. This technique prevents direct flames from scorching the meat, allowing for slow, even cooking.
You can experiment with flavor combinations by adding wood chips or marinades during this process. Preheat your grill, then turn off one or two burners for indirect heat. Place ribs on the cooler side of the grill, away from direct flames. Close the lid to maintain consistent heat and smoke flavor.
Monitor temperature with a meat thermometer for precise cooking. Use different seasoning blends to enhance flavor profiles with various cooking techniques.
Getting the Temperature and Cooking Time Just Right
Getting the temperature and cooking time just right is essential for tender, flavorful ribs. Using proper cooking techniques guarantees your ribs stay moist and develop a rich taste. Aim to keep your grill at around 225°F to 250°F, which allows slow, even cooking.
Achieving tender, flavorful ribs requires steady heat and precise timing for perfect results.
This low-and-slow method breaks down connective tissues, resulting in tender meat. Use a reliable meat thermometer to monitor the internal temperature, aiming for 190°F to 203°F for maximum tenderness.
Cooking time varies depending on the size of your ribs, but generally, they need about 3 to 4 hours. During this process, think about flavor pairings like smoky, sweet, or spicy rubs that enhance the meat’s natural flavor.
Adjust the grill’s heat as needed to prevent excessive charring or drying out the ribs. Patience is key; maintaining a steady temperature and timing will ensure your ribs are juicy, flavorful, and perfectly cooked every time.
Wrapping and Resting Ribs to Lock in Juiciness
Wrapping your ribs is a great way to lock in heat and moisture, which helps make them tender and packed with flavor. It’s like giving your ribs a cozy blanket during the cooking process.
And don’t forget about resting! Letting the ribs sit for a bit after cooking allows the juices to redistribute throughout the meat. That way, every bite stays nice and juicy. Keep these tips in mind, and you’ll end up with ribs that are both flavorful and super tender.
Benefits of Wrapping Ribs
Ever wonder why wrapping ribs during cooking can make such a difference? Wrapping helps trap moisture, so your ribs stay juicy and tender. It creates a barrier that keeps heat and moisture in, which boosts flavor and prevents drying out.
This technique also speeds up cooking and helps develop a smoky, caramelized exterior. By wrapping, you lock in those delicious juices, making each bite more flavorful. It’s a simple but effective way to improve your ribs’ texture and taste.
Plus, wrapping minimizes flare-ups and uneven cooking. Using foil or butcher paper is key to getting perfectly cooked ribs with richer flavor. Overall, wrapping is a must-try method to elevate your grilling game and enjoy tender, flavorful ribs every time.
Proper Resting Techniques
After wrapping your ribs to trap moisture and improve flavor, the next step is to let them rest properly. Resting helps the juices redistribute, making each bite tender and flavorful.
Wrap the ribs in foil and let them sit for about 10 to 15 minutes off the grill. This also helps prevent burns or overcooking, promoting grill safety.
Be mindful of your seasoning; resting won’t dilute the flavors if you’ve seasoned them well. During this time, avoid opening the foil too often, as that can release heat and moisture.
Proper rest time locks in the juiciness, making your ribs irresistibly tender. Once rested, you’re ready to serve, confident they’re juicy, safe to eat, and perfectly seasoned.
Juiciness Preservation Tips
To keep your ribs juicy, wrapping them tightly in foil during the resting period is key. This traps steam and juices, stopping them from escaping and keeping the meat moist and tender. Resting also helps flavors settle and juices distribute evenly.
You can boost this process by experimenting with marinade variations before cooking. Adding different flavors not only enhances taste but also helps lock in moisture. When wrapping, try adding a splash of apple juice or broth inside the foil to make the ribs even juicier.
For leftovers, store them in airtight containers to lock in moisture and prevent drying out. Always wrap tightly to keep the ribs as juicy as when they were first cooked.
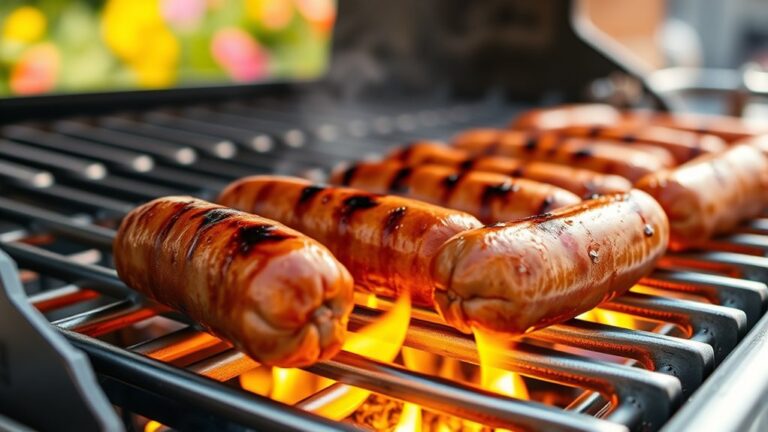
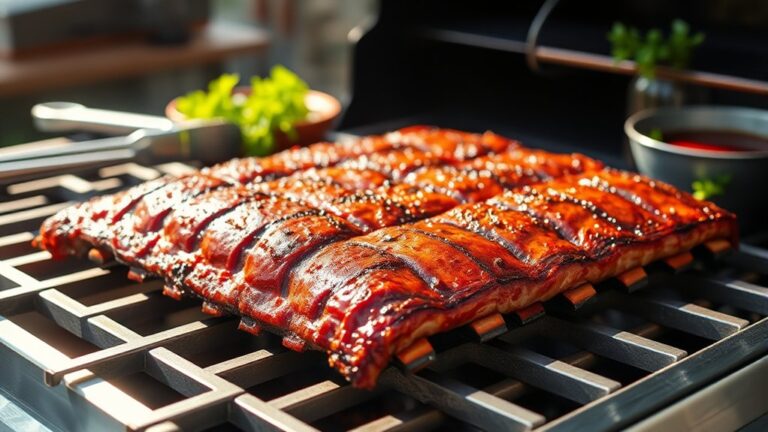
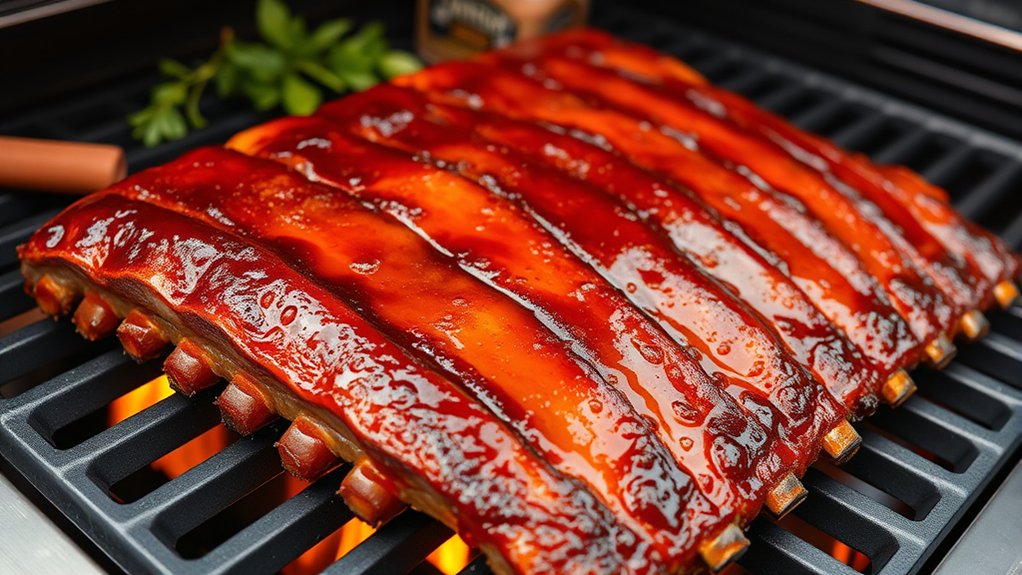
Adding Sauce and Achieving Perfect Grill Marks
How do you guarantee your ribs are flavorful and visually appealing? Start with the right sauce application. Brush it on during the last few minutes of grilling to prevent burning and build a rich, sticky glaze.
Use generous but even coats, allowing the sauce to caramelize slightly without overpowering the meat’s natural flavors. When adding sauce, avoid excessive flipping; instead, apply it in thin layers and give each side time to set before adding more.
To get perfect grill marks, use direct heat and position the ribs diagonally across the grill grates. Press gently with tongs or a spatula to create those distinctive crosshatch patterns.
Keep an eye on the temperature to prevent charring. Proper sauce application combined with precise grill mark techniques makes your ribs look as good as they taste—succulent, flavorful, and visually stunning.
Serving and Enjoying Your Juicy, Smoky Ribs
Ever wondered what makes the perfect moment to enjoy your juicy, smoky ribs? It’s when they’re tender, flavorful, and served with confidence. To make the experience even better, try pairing them with a cold craft beer, a rich red wine, or a refreshing iced tea.
Presentation can turn your ribs into a feast for the eyes. Try arranging them on a rustic platter, garnished with fresh herbs or lemon wedges. Rest your ribs briefly before serving to keep them juicy.
Slice them neatly and serve alongside classic sides like coleslaw or grilled veggies. Use attractive ribs cutters or tongs to make serving easier. Adding finger bowls or napkins makes eating more convenient.
Frequently Asked Questions
How Do I Prevent My Ribs From Drying Out During Grilling?
To prevent your ribs from drying out during grilling, focus on proper marinade techniques and maintaining the right ribs temperature.
Use a flavorful marinade to keep moisture in, and baste the ribs regularly. Keep the grill at a steady, low temperature—around 225°F to 250°F—and use a meat thermometer to make sure the ribs stay juicy without overcooking.
If needed, cover the ribs with foil to lock in moisture.
What Are Signs That Ribs Are Overcooked or Undercooked?
You’ll know your ribs are overcooked when the meat becomes very tender, starts to fall off the bone, but loses its moisture and turns dry.
Understood, they’re undercooked if the meat feels firm and the internal temperature is below 145°F, indicating it’s not yet tender enough.
Use a meat thermometer to check the internal temperature and look for signs of tenderness or firmness to avoid over or undercooking.
Can I Use a Gas Grill for Smoking Ribs?
Yes, you can definitely use a gas grill for smoking ribs. Interestingly, studies show that wood chips can improve flavor by 50%.
To do this, soak your wood chips, then place them over the burners set to indirect heat. This setup creates a smoky environment similar to traditional smoking methods, allowing you to infuse your ribs with rich, smoky flavor without needing a dedicated smoker.
How Often Should I Baste or Apply Sauce During Grilling?
You should baste or apply sauce every 20-30 minutes during grilling. This helps keep the marinade on and keeps the ribs moist.
Wait until the last 10-15 minutes to add a final layer if you want a thicker sauce or glaze. Keep an eye on the sauce’s consistency.
If it’s too thick, brush it on. If it’s too thin, wait a bit before applying again. This way, you get the perfect flavor and texture.
What’s the Best Way to Clean My Grill After Cooking Ribs?
Did you know that regular grill maintenance can extend your grill’s lifespan by up to 50%? After cooking ribs, it’s a good idea to clean your grill using high heat to burn off any residues.
Once the grill is hot, use a wire brush and scraper to remove grease and food particles. Just make sure the grill is cool before you start cleaning.
Don’t forget to clean the grease tray and heat tents too. Keeping everything tidy helps your grill perform better and keeps it safe to use.
Conclusion
Now that you’ve got the blueprint, your grill becomes a stage for a juicy symphony. Each step is a note, building to a crescendo of smoky, tender ribs.
With patience and practice, you’ll master this culinary dance, turning simple ingredients into a show-stopping feast.
So fire up that grill, follow the steps, and let your ribs sing a delicious tune that everyone will remember.
Enjoy your perfect ribs on the gas grill and make every bite unforgettable!