Grill Mastery: How Long to Grill Chicken Drumsticks on Gas
Cooking perfect chicken drumsticks on a gas grill can be tricky, and many grill enthusiasts struggle with getting that juicy, crispy finish. If you’ve ever ended up with dry or unevenly cooked chicken, you’re not alone.
The good news is, with a little guidance, you can master grilling chicken drumsticks effortlessly.
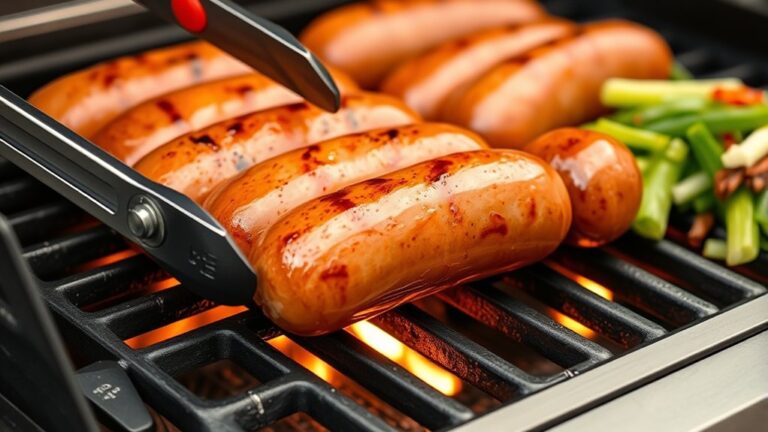
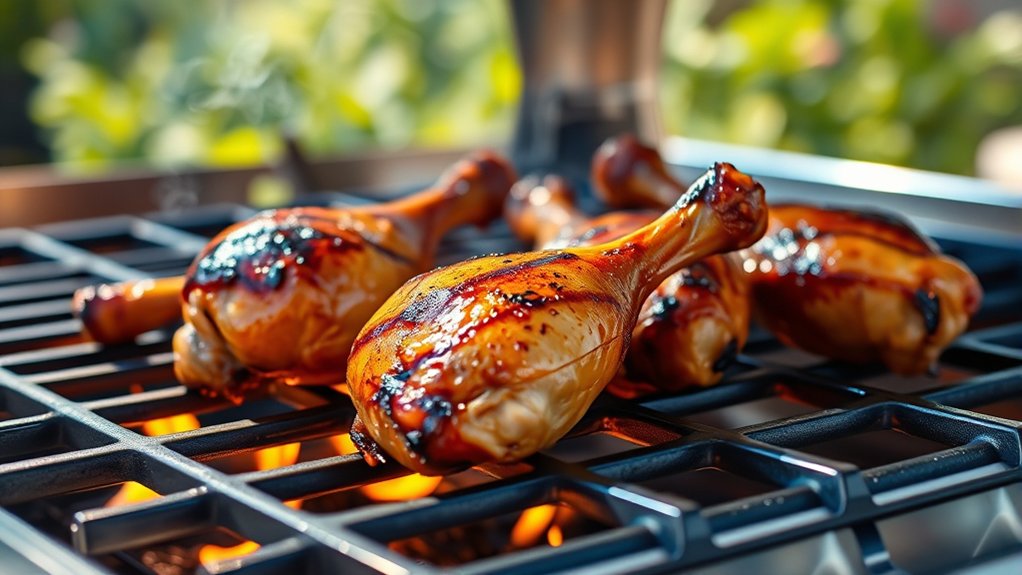
For juicy, crispy chicken drumsticks on a gas grill, cook them for about 25-30 minutes at a temperature of 375°F to 400°F. Turn them every 5-7 minutes to guarantee even cooking and avoid burning.
Use a meat thermometer to check that the internal temperature reaches 165°F—you’ll know they’re done. Rest the chicken for five minutes before serving to lock in juices.
If you want expert tips, keep exploring these grilling secrets.
Key Takeaways
- Grill chicken drumsticks for 25-30 minutes at 375°F to 400°F, turning every 5-7 minutes for even cooking.
- Use a digital meat thermometer to check that the internal temperature reaches 165°F for safe, juicy results.
- Start with indirect heat, then finish with direct heat to crisp up the skin without overcooking.
- Pat dry the chicken and marinate for at least 30 minutes to help promote even cooking and get that flavorful, crispy skin.
- Rest the chicken for 5 minutes after grilling so the juices can redistribute and make it more tender.
How Long Should You Grill Chicken Drumsticks on a Gas Grill?

Wondering how long to grill chicken drumsticks on a gas grill? The key is to cook them until they reach an internal temperature of 165°F, which usually takes about 25-30 minutes over medium heat.
To keep your drumsticks flavorful and juicy, consider marinating them beforehand with options like BBQ, honey mustard, or spicy sriracha. This adds flavor and helps keep the meat moist during grilling.
As for seasoning, don’t be shy—use a dry rub with spices like paprika, garlic powder, and black pepper. Let the rub sit for at least 30 minutes before grilling.
Turn the drumsticks every 5-7 minutes to ensure even cooking and prevent burning. Proper timing, along with good marinade and seasoning, guarantees tender, flavorful chicken every time.
What Factors Affect Grilling Time for Chicken Drumsticks?
Several factors can influence how long your chicken drumsticks take to cook on a gas grill, so it’s important to keep them in mind when planning your grilling session. First, the size and thickness of the drumsticks matter; larger pieces need more time to cook through.
Size and thickness of drumsticks significantly impact cooking time on a gas grill.
Second, the grill’s temperature affects cooking speed. Higher heat shortens cooking time but can risk burning the chicken if you’re not careful. Third, your marinade techniques and flavor pairing can impact moisture retention, which in turn influences how evenly the chicken cooks.
Marinated drumsticks that absorb more liquid tend to stay juicier, so they might take a little longer to cook. Fourth, outdoor conditions like wind or temperature can also play a role because they affect heat consistency.
Understanding these factors helps you adjust your grilling approach, making sure your chicken is perfectly cooked and flavorful every time. Paying attention to these details guarantees your chicken is cooked through without losing its flavor or succulence.
How to Prepare Chicken Drumsticks for Perfect Grilling

To achieve perfectly grilled chicken drumsticks, proper preparation is key. Start by choosing fresh, evenly sized drumsticks so they cook uniformly.
Use seasoning techniques like salt, pepper, garlic powder, and paprika to boost flavor. You can also try marinades, such as soy sauce, honey, and lemon juice, which add moisture and depth.
Marinating for at least 30 minutes helps tenderize the meat and infuse it with flavor. If you prefer dry seasoning, rub the spices onto the drumsticks, making sure they’re evenly coated.
Before grilling, pat the meat dry to promote even browning. Also, let the chicken sit at room temperature for about 15 minutes to ensure it cooks evenly.
Proper preparation not only enhances flavor but also helps you get juicy, crispy exterior grilled chicken drumsticks. With these steps, you’re set for a delicious, perfectly cooked meal.
What Is the Best Gas Grill Temperature for Juicy, Crispy Chicken Drumsticks?
If you want juicy, crispy chicken drumsticks, the best grill temperature is around 375°F to 400°F. This temperature range is perfect because it cooks the chicken all the way through while giving the skin that nice, crispy finish you’re after. Just make sure to keep the heat steady so you get that nice balance of tender meat and crunchy skin.
Ideal Grill Temperature
Achieving perfectly cooked chicken drumsticks on your gas grill depends on keeping the right temperature. The ideal grill temp for juicy, flavorful results is between 375°F and 400°F. This range helps the chicken cook evenly without drying out.
To boost flavor, try marinades like citrus, herb, or spicy blends before grilling. Once cooked, pairing with sauces like barbecue, buffalo, or honey mustard really complements the smoky flavor.
Keep these tips in mind:
- Maintain a consistent heat within 375°F–400°F.
- Use a meat thermometer to check that the internal temp hits 165°F.
- Adjust burners to prevent flare-ups and uneven cooking.
- Let the drumsticks rest a few minutes before serving to lock in juices.
This temperature range strikes the right balance for tender, crispy skin and moist meat.
Achieving Crispy Skin
Getting crispy skin on your chicken drumsticks while keeping the meat juicy depends on getting the right grill temperature. Aim for around 375°F to 400°F to help the skin crisp up without drying out the meat.
Marinades like a honey-soy glaze or citrus-based options can boost flavor and help promote crispiness. Before grilling, pat the chicken dry to remove excess moisture, which can prevent the skin from getting crispy.
Use direct heat for the last few minutes to crisp up the skin, then move the drumsticks to indirect heat to finish cooking through. Keep a close eye on the temperature and avoid overcooking for best results.
For presentation, arrange the drumsticks on a platter and garnish with fresh herbs. This makes your dish look as tempting as it tastes.
How to Grill Chicken Drumsticks Step by Step
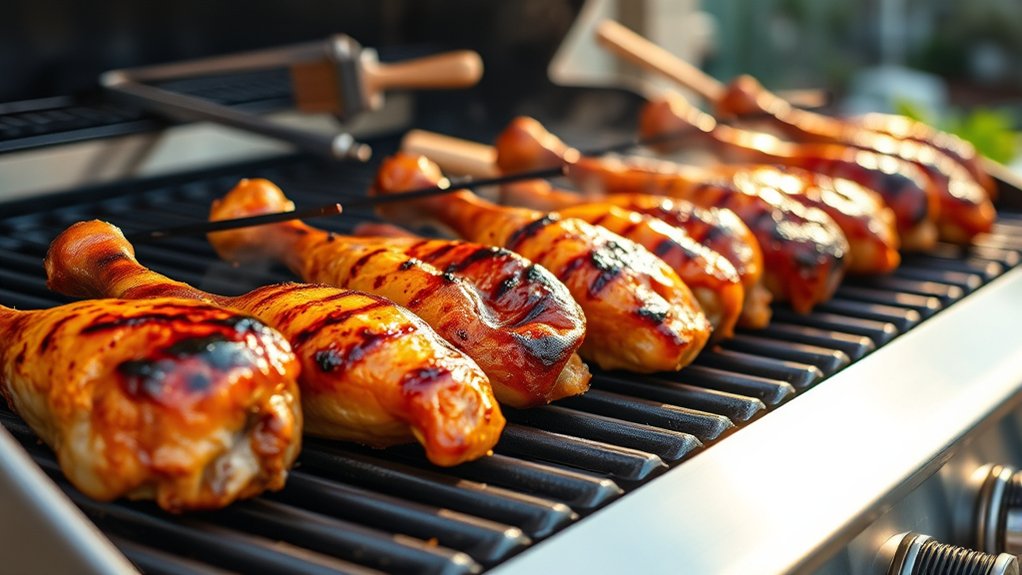
Grilling chicken drumsticks might seem simple, but getting it just right takes some tips. Start by choosing your marinade—think spicy BBQ, honey mustard, or citrus herb—to add flavor.
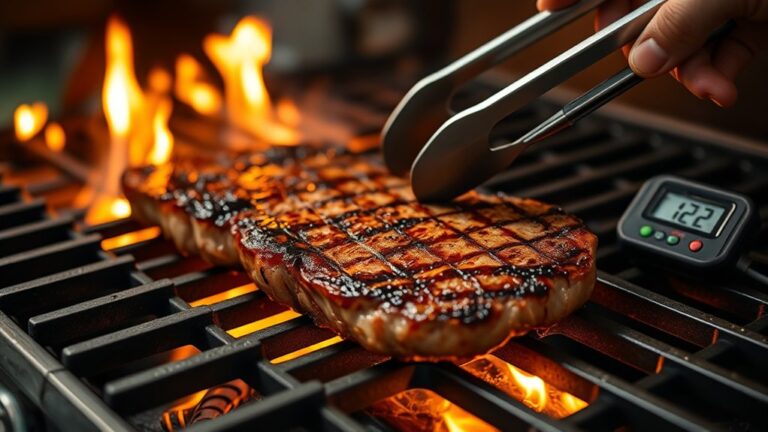
Preheat your gas grill to medium-high heat, around 375-400°F. Clean and oil the grates to stop the chicken from sticking.
Place the drumsticks on the grill, turning every 5-7 minutes for even cooking. Use direct heat for searing and indirect heat to finish cooking through.
While the chicken cooks, consider side dishes like grilled veggies, corn on the cob, or a fresh salad to round out the meal.
Make sure not to overcrowd the grill so everything cooks evenly. Follow these steps, and you’ll end up with tender, juicy chicken with crispy skin, perfect with your favorite sides.
How to Use a Meat Thermometer to Ensure Chicken Is Fully Cooked and Safe
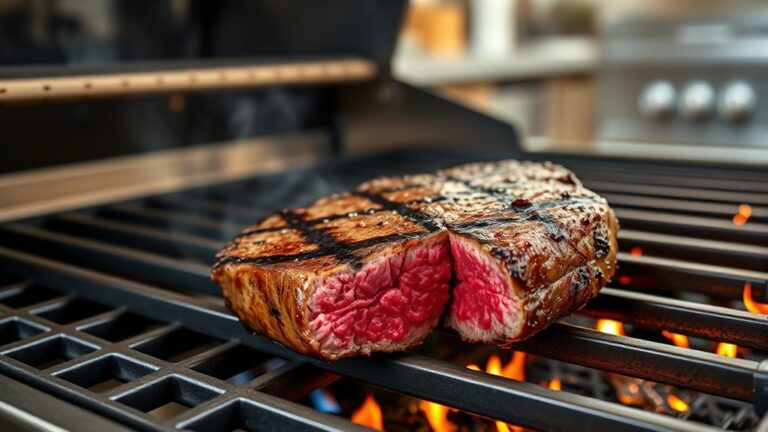
Using a meat thermometer the right way is super important if you want to make sure your chicken is cooked all the way through and safe to eat. You’ll want to get an accurate reading, so it’s a good idea to place the thermometer in the right spot. And just a quick reminder — the chicken’s safe internal temperature is 165°F.
Proper Temperature Reading
To guarantee your chicken is safely cooked, you need to accurately measure its internal temperature with a meat thermometer. This helps ensure proper doneness and food safety.
When checking the temperature, avoid contact with marinade techniques that might affect readings. Focus on consistent placement for accurate results. Use these tips:
- Insert the thermometer into the thickest part of the drumstick, avoiding the bone.
- Wait for the reading to stabilize before recording.
- Ensure the temperature reaches 165°F (74°C), which is the safe zone for poultry.
- Let the chicken rest before plating to allow the juices to settle. Proper temperature readings help you avoid overcooking, which can affect texture and appearance, and undercooking, which risks safety.
Accurate readings also support elegant presentation by showcasing perfectly cooked, juicy chicken.
Correct Thermometer Placement
Have you ever wondered if you’re placing your thermometer correctly? Proper thermometer placement is key to accurately checking your chicken drumsticks.
Insert the meat thermometer into the thickest part of the drumstick, avoiding the bone, as bones can give false readings. Make sure the probe is deep enough to reach the center of the meat for an accurate temperature.
When you’re seasoning your grill, keep in mind that grill seasoning can sometimes mask surface temperature. So, focus on internal readings to check for doneness.
Keep the thermometer steady and perpendicular to the meat to get a consistent reading. Avoid touching the bone or fat, which can skew results.
Correct thermometer placement ensures you know exactly when your chicken is cooked perfectly and safe to eat.
Safe Internal Temperature
Once you’ve placed your thermometer correctly, the next step is to confirm that your chicken has reached a safe internal temperature. This guarantees it’s fully cooked and safe to eat. Use a reliable meat thermometer, ideally a digital one, for accuracy. Remember, the USDA recommends an internal temperature of 165°F for chicken drumsticks. To improve flavor pairing, wait until the thermometer reads this temperature before removing the chicken from the grill.
Consider grilling accessories like a heat-resistant probe or grill tongs for better control. Here are key points to verify: Check the thermometer in the thickest part of the drumstick. Avoid touching bone, which can give a false reading.
Allow resting time for juices to redistribute. Use the temperature as your ultimate doneness guide, not just visual cues.
Common Mistakes That Lead to Undercooked or Overcooked Chicken Drumsticks
One common mistake that leads to undercooked or overcooked chicken drumsticks is relying only on cooking time instead of checking the internal temperature. You might think a set time guarantees perfect results, but without a thermometer, you risk ending up with dry or raw meat.
Ignoring different marinade types can also cause uneven cooking or burnt spots. Sugary or thick marinades may heat differently, so it’s a good idea to adjust your cooking time based on what you used.
Serving your chicken right away is important too. Overcooked drumsticks lose moisture and become less appealing, so letting them rest for about five minutes helps keep the juices in.
Finally, overcooking or undercooking can ruin the texture and flavor. The best way to avoid this is to follow the recommended internal temperature for perfectly cooked chicken.
Tips for Achieving Crispy Skin and Tender Meat Every Time
Achieving crispy skin and tender meat every time starts with proper preparation and technique. First, choose your marinade wisely; a mix with a bit of oil and acidity helps tenderize and adds flavor.
Next, pat the drumsticks dry before grilling—moisture prevents crispiness. To ensure even cooking and crispness, preheat your grill to medium-high and avoid flipping too often.
Finally, let the drumsticks rest briefly after grilling. This locks in juices and helps achieve a beautiful, crispy exterior.
Here are key tips to perfect the process:
- Use marinades that include oil and acid for flavor and tenderness.
- Pat dry before grilling to promote crispiness.
- Keep the grill at medium-high heat and avoid excessive flipping.
- Rest the chicken briefly before plating for better texture and presentation.
Why Resting Your Chicken Drumsticks Improves Juiciness and Flavor
Resting your chicken drumsticks after grilling gives the juices a chance to redistribute throughout the meat, so they don’t spill out when you cut into it. This step is key to keeping your chicken juicy and flavorful.
When you let the meat rest, the natural juices—whether from lemon and herb marinade or spicy rubs—settle evenly. This results in a moist, tender bite every time.
Resting also deepens the flavors, making each piece more delicious. While your chicken rests, you can prep side dishes like grilled vegetables or a fresh salad to go with it.
Cutting into the meat right after grilling causes the juices to escape, leaving your chicken dry. Just wait a few minutes, and you’ll get maximum juiciness and flavor.
Plus, those few minutes give you time to set the table or finish up your sides, making your grilled chicken the star of a well-rounded meal.
Troubleshooting: What to Do If Your Chicken Drumsticks Are Undercooked or Overcooked
If your chicken drumsticks aren’t quite cooked enough, you might notice they’re still a bit pink or the center feels cool to the touch. No worries—just give them a little more time to cook. It’s a good idea to use a meat thermometer to check the internal temperature; it should read 165°F (75°C) for fully cooked chicken. Getting familiar with these signs and making small adjustments helps you end up with juicy, perfectly cooked drumsticks every time.
Signs of Undercooking
When chicken drumsticks are undercooked, they often feel firm or rubbery to the touch, and their juices may still run pink or bloody. Recognizing these signs helps prevent foodborne illness and guarantees juicy, safe meat.
Key indicators include juicy that bleed pink when pierced and a rubbery texture that doesn’t yield easily. You might also notice a cold or uncooked appearance near the bone or an internal temperature below 165°F (74°C) despite the surface looking done.
To avoid undercooking, try marinade ideas that promote even heat penetration. Proper storage with airtight containers and good cooling techniques help keep leftovers fresh, reducing the risk of undercooked meat in your next cooking attempt.
Adjusting Cooking Time
Adjusting cooking time is the key to perfect chicken drumsticks, whether they come out underdone or overdone. If your chicken is undercooked, extend the grilling time in small steps, and check with a meat thermometer until it hits 165°F.
For overcooked drumsticks, turn down the heat or cut the grilling time short to avoid drying them out. Think about how your marinade might affect cooking—thicker or sugary marinades can cause flare-ups or uneven cooking, so adjust your grill temperature as needed.
When cooked right, your drumsticks will be juicy and flavorful, perfect for serving with your favorite sides or a fresh salad. If necessary, you can also tweak cooking times based on how consistent your grill heat is for better results next time.
Ensuring Proper Doneness
Achieving perfect doneness requires careful troubleshooting to fix common issues like undercooked or overcooked chicken drumsticks. If your chicken isn’t cooked through, try adjusting your seasoning or marinade options for better heat absorption.
Use a meat thermometer and aim for 165°F (75°C) to check doneness accurately. If it’s undercooked, wrap the drumsticks in foil and cook over indirect heat until the internal temperature reaches the right level.
Overcooked chicken can be rescued by briefly soaking it in a marinade or sauce to add moisture. For even cooking, turn the drumsticks regularly and make sure your grill’s heat stays consistent.
Troubleshooting these issues helps you master grilling and guarantees juicy, flavorful chicken every time.
Frequently Asked Questions
Can I Grill Chicken Drumsticks Directly From Frozen?
You can grill frozen chicken drumsticks directly, but it’s not recommended. Frozen chicken takes longer to cook thoroughly, which can lead to uneven heating or dryness.
Plus, marinating won’t work well on frozen chicken because it doesn’t absorb flavors effectively. To get the best results, it’s better to thaw your chicken first.
Thawing helps ensure even cooking and allows the marinade to penetrate better, resulting in juicy, flavorful drumsticks.
How Do Marinades Affect Grilling Time and Flavor?
Marinades boost flavor and can also influence grilling time. When you marinate chicken drumsticks, the marinade seeps into the meat, adding taste and juiciness.
It can also soften the texture, which might make grilling take longer or sometimes less time. For the best results, let the chicken marinate for at least 30 minutes, up to a few hours. This way, the flavors develop without making the chicken too mushy.
Keep an eye on the grill to prevent overcooking, especially with marinated meat.
What’s the Best Way to Prevent Sticking on a Gas Grill?
To prevent sticking on a gas grill, focus on proper grill surface preparation and marinade techniques. Clean the grill grates thoroughly before cooking, then lightly oil the surface to create a non-stick barrier.
Marinate your chicken drumsticks beforehand to add flavor and moisture, but be sure to pat them dry before grilling. This helps prevent excess marinade from causing sticking.
Following these simple steps will help you get perfectly cooked and flavorful chicken every time.
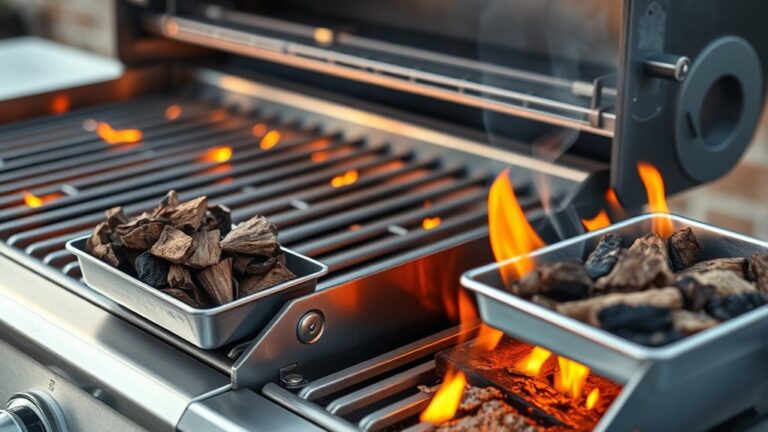
How Do Different Wood Chip Flavors Influence Grilled Chicken?
Think of wood chip flavors as a painter’s palette for your chicken’s taste. Different woods give off unique smoke infusions: hickory adds a robust richness, apple offers a sweet, fruity aroma, and mesquite brings bold intensity.
These wood flavors influence grilled chicken by infusing it with distinct character and enhancing juiciness. They also help create a layered, complex flavor profile.
Experimenting with various wood chips lets you craft a personalized smoky symphony for every barbecue. Just have fun exploring different combinations to find your favorite!
Is It Better to Grill With Lid Open or Closed?
You should grill with the lid closed for even cooking and to maintain consistent heat, which improves flavor and texture. This technique traps heat and smoke, making your chicken more tender.
Remember safety tips: keep the lid closed to prevent flare-ups and monitor the temperature. Opening the lid frequently can cause flare-ups and uneven cooking, so trust your cooking techniques and keep the lid on unless flipping or checking doneness.
Conclusion
Mastering the grill is like conducting a symphony—each step tuning your chicken to perfection. With patience, proper temperature, and attention to detail, you’ll craft juicy, crispy drumsticks that sing with flavor.
Think of your grill as a canvas, and each turn of the drumstick as a brushstroke. Before you know it, your backyard will echo with the aroma of victory.
When grilling chicken drumsticks on a gas grill, aim for a medium-high heat, around 375°F to 400°F. Grill the drumsticks for about 25-30 minutes, turning occasionally for even cooking.
The key is to reach an internal temperature of 165°F. Once they hit that mark, you’ll know your chicken is juicy and thoroughly cooked.
So, with a little patience and attention to detail, you’ll master the art of grilling chicken drumsticks on gas. Your backyard will be filled with the irresistible aroma of smoky, savory delight.